self guided tour du mont blanc

Self-Guided Tour du Mont Blanc: A Comprehensive Plan

Embark on an unforgettable alpine adventure! This guide details planning a spectacular, independent trek around Western Europe’s highest peak, Mont Blanc.

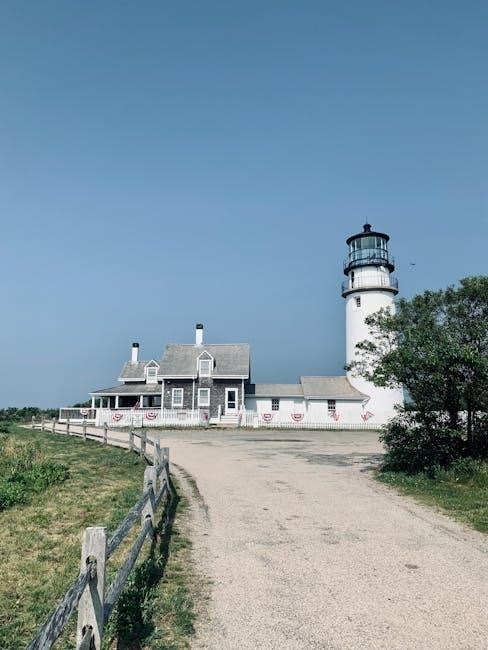
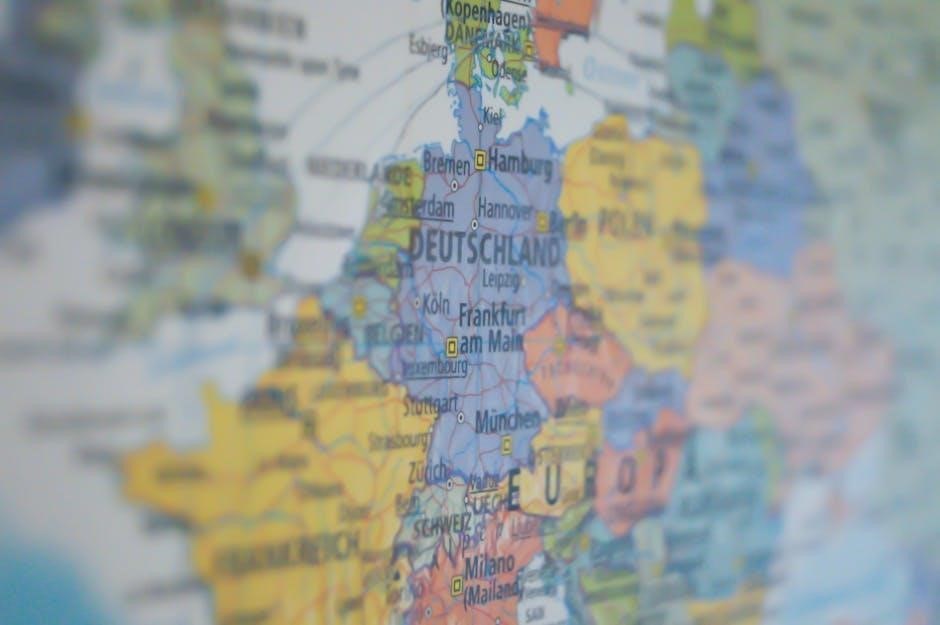
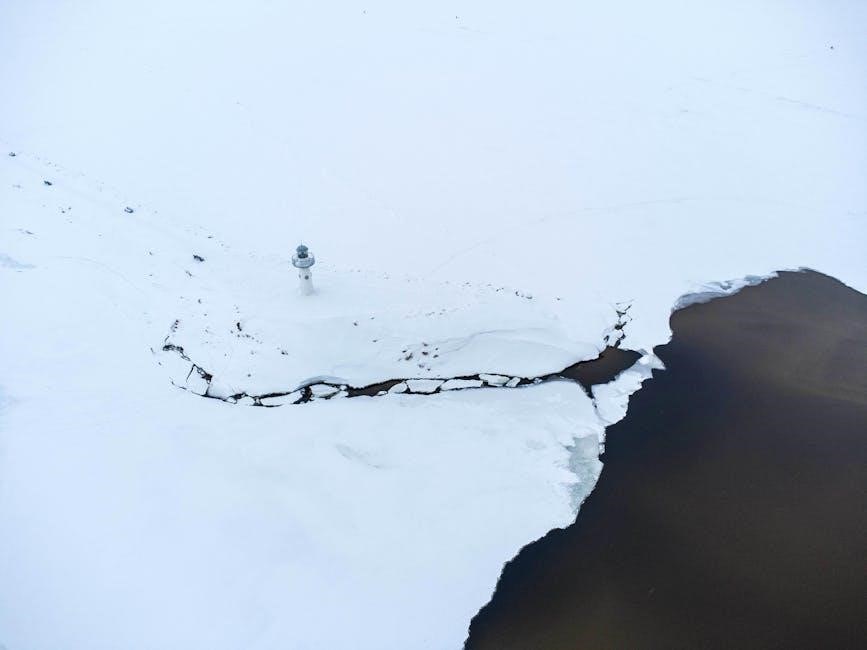
The Tour du Mont Blanc (TMB) is one of Europe’s most iconic long-distance hiking trails. Circling the Mont Blanc massif, this incredible route traverses through three countries: France, Italy, and Switzerland. Typically completed over 10-11 days, the TMB offers breathtaking scenery, challenging ascents, and charming alpine villages.

The trail showcases dramatic landscapes, including glaciers, wildflower meadows, and stunning mountain vistas. It’s a journey that immerses you in the heart of the Alps, providing a unique cultural experience alongside physical exertion. While often undertaken with a guide, the TMB is exceptionally well-suited for independent, self-guided adventures. This allows for a personalized experience, tailored to your pace and preferences. Prepare to be captivated by the raw beauty and invigorating challenge of the Tour du Mont Blanc!

Why Choose a Self-Guided TMB?

Opting for a self-guided Tour du Mont Blanc unlocks a world of benefits for the independent adventurer. Unlike guided tours with fixed schedules, you dictate your own pace, allowing for spontaneous detours and extended stays in picturesque villages. This freedom is invaluable for truly immersing yourself in the alpine environment.

Furthermore, a self-guided trek often proves more economical. Eliminating guide fees and pre-set accommodation packages significantly reduces overall costs. You have complete control over your budget, choosing accommodation and meals that align with your preferences. The challenge of planning and navigating independently adds a rewarding sense of accomplishment. Embrace the spirit of exploration and create a truly personalized TMB experience!

Flexibility and Independence

The cornerstone of a self-guided TMB is unparalleled flexibility. You’re not bound by a group’s pace or a rigid itinerary. Feel like lingering longer in a charming village? Do it! Discover a hidden trail beckoning exploration? Follow it! This freedom allows for a deeply personal connection with the mountains.

Independence extends to daily decisions – where to eat, when to rest, and even which route variations to explore. Embrace spontaneous changes based on weather conditions or your energy levels. This level of control fosters a sense of self-reliance and adventure. A self-guided trek empowers you to craft an experience perfectly tailored to your desires, creating lasting memories forged on your own terms.

Cost Savings Compared to Guided Tours

Opting for a self-guided Tour du Mont Blanc significantly reduces expenses. Guided tours bundle services – accommodation, meals, a guide – adding substantial costs. By arranging these independently, you retain control over your budget.

Accommodation choices range from budget-friendly refuges to comfortable gîtes, allowing you to select options aligning with your financial plan. Similarly, self-catering with packed lunches and grocery shopping minimizes meal costs. While requiring more planning, this approach unlocks considerable savings. Eliminating the guide fee is a major benefit, freeing up funds for other experiences or extending your trip. A self-guided TMB offers adventure without breaking the bank!

Planning & Preparation: The Essentials

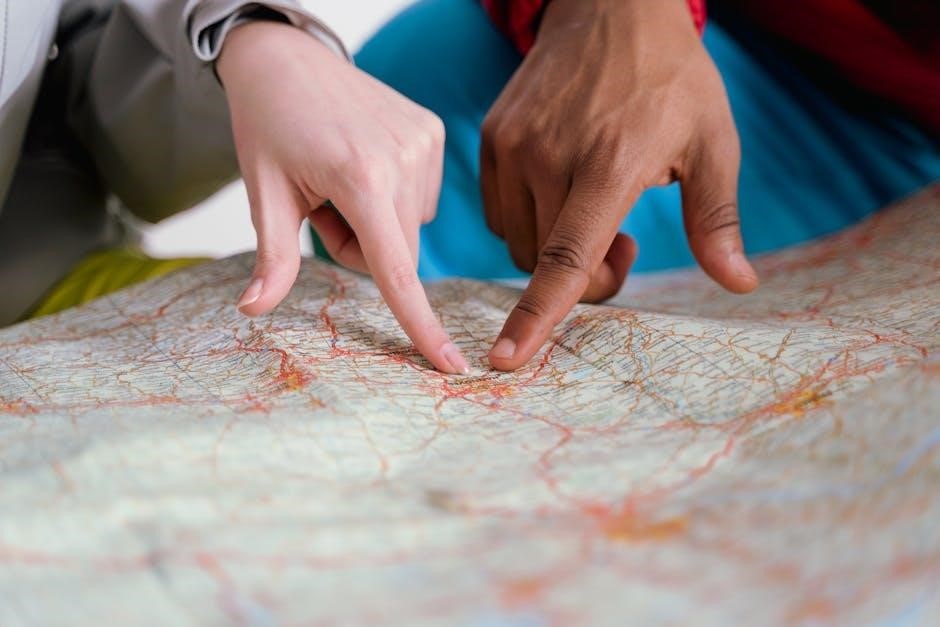
Successful completion of the Tour du Mont Blanc demands meticulous planning. Begin well in advance – ideally six to nine months – to secure accommodation, especially refuge bookings which open months prior. Thorough route research is crucial; detailed maps and guidebooks are indispensable tools.

Assess your fitness honestly; the TMB is challenging. A consistent training regime, incorporating hill walking with a weighted pack, is highly recommended. Familiarize yourself with mountain safety protocols and basic first aid. Don’t underestimate the importance of appropriate gear – a comprehensive checklist is vital. Finally, understand the logistical aspects of transportation to and from the trailheads.

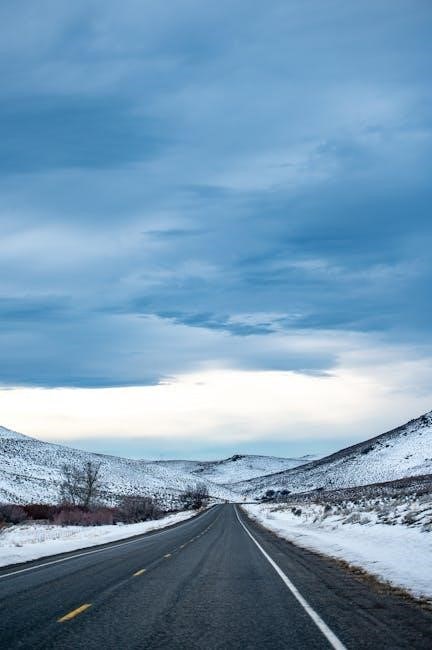
Best Time to Hike the TMB

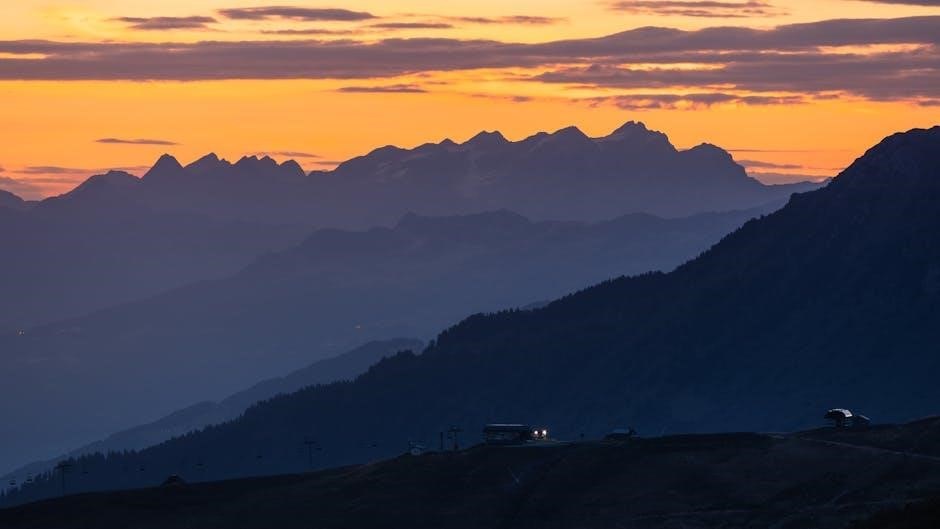
The optimal window for hiking the Tour du Mont Blanc is typically from mid-June to mid-September. July and August offer the warmest temperatures and lowest chance of snow at higher altitudes, but also experience the highest crowds. June and September provide a quieter experience, though you may encounter lingering snow patches or early autumn conditions.

Outside of these months, many refuges are closed, and conditions become increasingly unpredictable. Be prepared for potential snow, ice, and challenging weather even within the core season. Checking weather forecasts daily is essential, and flexibility in your itinerary is recommended to adapt to changing conditions. Consider shoulder season for fewer hikers, but pack accordingly!

Fitness Level Required

The Tour du Mont Blanc is a challenging trek demanding a good level of physical fitness. You should be comfortable hiking for 6-8 hours per day, over varied terrain, with significant elevation gain and loss – often carrying a backpack weighing 8-12kg.

Prior to your trek, regular cardiovascular exercise (running, cycling, swimming) and strength training (legs, core) are highly recommended. Several practice hikes with a loaded backpack are crucial to test your gear and build endurance. A base level of fitness will significantly enhance your enjoyment and reduce the risk of injury. Don’t underestimate the cumulative effect of multiple days on the trail!

Route Options & Variations

While the classic Tour du Mont Blanc is the most popular choice, several variations cater to different fitness levels and time constraints. Experienced hikers might consider tackling the more demanding ‘High Route’, featuring exposed sections and challenging passes, offering breathtaking panoramic views. Alternatively, the ‘Valley Route’ provides a less strenuous option, following lower-altitude paths through charming villages.

Shorter itineraries, typically spanning 7 days, focus on specific sections of the TMB, often concentrating on the French or Italian side. Customization is key; you can combine sections or create loops to tailor the trek to your preferences and available time. Careful planning is essential when deviating from the standard route.

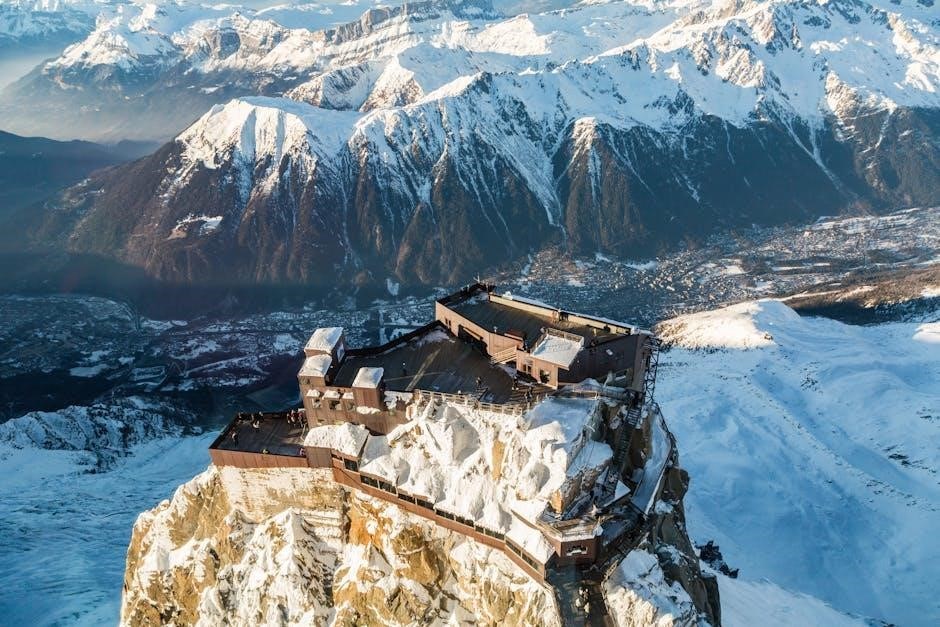
The Classic TMB Route (11 Days/10 Nights)

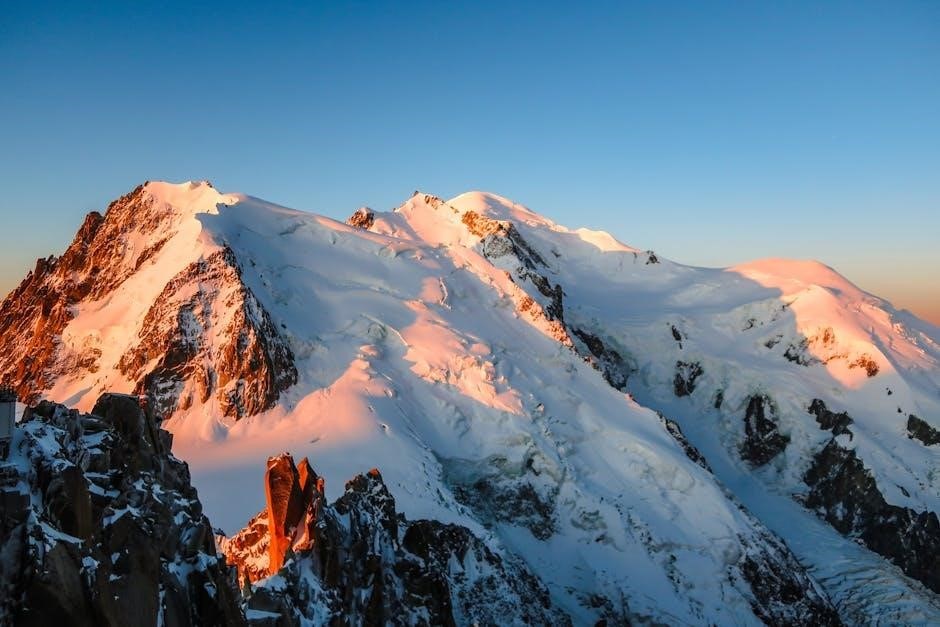
The quintessential Tour du Mont Blanc experience covers approximately 170 kilometers (106 miles) with around 9,600 meters (31,500 feet) of ascent and descent. This route typically takes 11 days, incorporating 10 nights in mountain refuges, gîtes, or hotels. It circles the entire Mont Blanc massif, traversing through France, Italy, and Switzerland.

Expect diverse terrain, from lush valleys and forests to rocky alpine passes and glacial landscapes. Daily distances vary, averaging 15-20 kilometers, but some stages are more challenging. The route showcases iconic landmarks like the Col de la Croix du Bonhomme, the Grand Col Ferret, and the Fenêtre d’Arpette, offering unparalleled views.

Shorter Variations (7 Days/6 Nights)

For hikers with limited time, several shorter TMB variations offer a taste of the adventure. A popular 7-day itinerary focuses on the most scenic sections, typically starting and ending in Chamonix. This often involves utilizing lifts and buses to bypass some of the longer, less dramatic stages.

Common shortened routes concentrate on the French and Italian sides of Mont Blanc, omitting the Swiss portion to reduce overall distance. These variations still provide challenging ascents and stunning alpine scenery, but require a higher daily mileage. Prioritize booking accommodations well in advance, as popular refuges fill quickly, even on shorter sections. Consider focusing on the core highlights for a fulfilling experience.

High Route vs. Valley Route Considerations

The TMB presents choices beyond the classic path: the High Route and Valley Route. The High Route, as the name suggests, stays consistently at higher altitudes, offering more dramatic views and challenging terrain. It demands excellent fitness and experience with exposed sections. Expect more demanding ascents and descents, and potential for snow even in summer.

The Valley Route, conversely, utilizes lower-altitude paths and villages, providing a less strenuous experience. It’s ideal for those less comfortable with heights or seeking a more relaxed pace. While views may be slightly less expansive, the Valley Route offers charming cultural encounters and easier access to amenities. Carefully assess your abilities and preferences before deciding which route best suits your TMB adventure.

Accommodation: Booking & Types

Securing lodging is crucial for a smooth TMB experience. The most popular option is staying in refuges (mountain huts), offering dormitory-style accommodation and meals. Booking well in advance – often 6-12 months – is essential, especially during peak season (July-August). Online reservation systems are available for many refuges, but some require direct contact.

Alternatively, gîtes (rural guesthouses) and hotels in valley villages provide more privacy and comfort. These are generally easier to book on shorter notice, but may require transportation to/from the trail. Consider a mix of refuge and village stays for variety. Be prepared for basic facilities in refuges; earplugs and a sleep sheet are recommended!

Refuges (Mountain Huts) – Booking Process

Booking refuges requires planning and persistence. Many refuges utilize online reservation platforms like Refuges d’Alpinisme or have their own websites. Start checking availability 6-12 months in advance, particularly for July and August. Be prepared to create accounts and navigate French/Italian websites – translation tools are helpful!

If online booking isn’t available, you’ll need to email or call directly. Response times can be slow. Have alternative dates and refuge options ready. Some refuges require a deposit. Confirm your reservation and understand cancellation policies. Be aware that even with a reservation, beds aren’t guaranteed if you arrive significantly after the stated check-in time.

Gîtes & Hotels in Villages – Alternatives to Refuges

For those preferring more comfort, or facing fully booked refuges, villages along the TMB offer excellent alternatives. Gîtes d’étape are simple, budget-friendly accommodations, often dormitory-style, providing a communal atmosphere. Hotels range from basic to luxurious, catering to various budgets.

Booking.com and other travel websites are useful for finding hotels. Gîtes often require direct contact via phone or email. Staying in villages means potentially longer daily hiking distances to reach the next accommodation, but offers access to restaurants and shops. This can be a welcome change of pace from the more rustic refuge experience, providing a softer landing each night.

Gear Checklist: What to Pack

Packing strategically is crucial for a comfortable TMB experience. Prioritize lightweight, durable gear. A well-fitted backpack (50-70 liters) is essential, alongside sturdy, broken-in hiking boots. Trekking poles significantly reduce strain on knees, especially during descents.

Don’t underestimate the importance of a waterproof jacket and trousers – mountain weather is unpredictable! A headlamp with extra batteries is vital for early starts or late arrivals. A first-aid kit, including blister treatment, is non-negotiable. Remember a reusable water bottle or hydration reservoir, and a quick-drying towel. Careful packing minimizes weight and maximizes enjoyment.

Essential Hiking Equipment

Your core hiking equipment forms the foundation of a successful TMB trek. Invest in a comfortable, supportive backpack (50-65 liters) with a rain cover. Sturdy, waterproof hiking boots, properly broken-in before your trip, are paramount to prevent blisters. Trekking poles are highly recommended for stability and reducing joint impact.

A reliable headlamp with spare batteries is crucial for navigating refuges at night or starting before dawn. Don’t forget a detailed map (1:25,000 scale) and a compass, even if using GPS. A basic repair kit – including duct tape, knife, and cord – can resolve minor gear issues on the trail. Prioritize quality and durability!

Clothing & Layers for Variable Weather

Mountain weather is notoriously unpredictable; layering is key! Start with moisture-wicking base layers (synthetic or merino wool) to keep you dry. Add insulating mid-layers – a fleece or lightweight down jacket – for warmth. A waterproof and windproof outer shell jacket and trousers are essential, even in summer.

Pack hiking trousers (convertible ones are versatile) and several pairs of hiking socks (wool or synthetic blend). A warm hat and gloves are vital, even if the forecast looks good. Don’t underestimate the sun – bring sunglasses and a sun hat. Consider bringing gaiters to keep debris out of your boots.

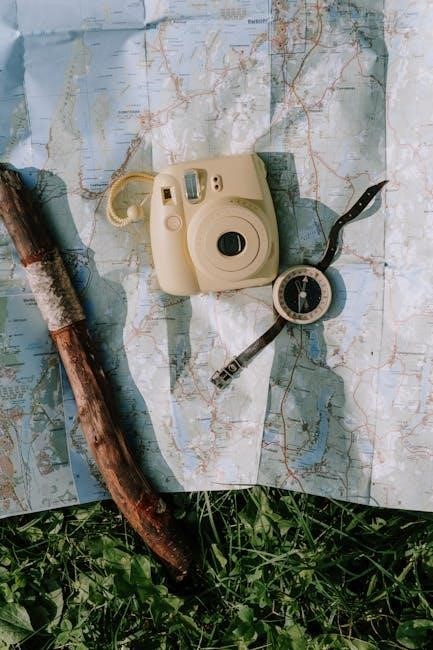
Navigation Tools (Maps, GPS, Compass)

Reliable navigation is crucial for a self-guided TMB. While the trail is well-marked, conditions can change rapidly. A detailed, waterproof map (1:25,000 scale is recommended) is essential. Complement this with a GPS device or smartphone with offline maps downloaded – ensure sufficient battery life or a power bank!

Don’t rely solely on technology. Knowing how to use a compass and map is a vital skill. Practice before you go! Familiarize yourself with the TMB’s specific signage and trail markings. Carry a whistle for signaling in emergencies. Regularly check your position and be aware of your surroundings – don’t blindly follow a GPS track.

Daily Itinerary Outline (Classic Route)

The classic TMB route typically spans 11 days/10 nights. This is a demanding schedule, requiring good fitness. Days involve 6-8 hours of hiking, with significant elevation gain/loss. This outline provides a general framework; adjust based on your pace and preferences.

Expect varied terrain – from gentle valley walks to challenging mountain passes. Stages often involve transfers between countries (France, Italy, Switzerland). Pre-booking accommodation is essential, especially during peak season. Remember to factor in rest days or shorter stages if needed. Detailed stage descriptions will follow, outlining distances, elevation profiles, and potential challenges for each day of your trek.

Stage 1: Les Houches to Refuge de Bellachat

This initial stage is a challenging ascent, approximately 10km with 900m of elevation gain. Starting in Les Houches, the trail immediately begins climbing through forests, offering glimpses of the Chamonix valley. Expect a steep, sustained climb, testing your initial fitness.

The path winds upwards, eventually emerging above the treeline with increasingly dramatic views of the Mont Blanc massif. The Refuge de Bellachat, perched on a rocky outcrop, provides stunning panoramic vistas. Booking at Bellachat is crucial; it’s a popular refuge. Be prepared for potentially exposed sections and variable weather. Allow 5-7 hours for this demanding first day, rewarding you with incredible scenery.

Stage 2: Refuge de Bellachat to Courmayeur (Italy)

Today’s 15km stage descends into the valley and then climbs towards the Italian border, boasting spectacular views. From Bellachat, the trail initially descends, traversing alpine meadows before a more challenging ascent towards the Col de Balme. This section can be rocky and exposed, requiring careful footing.

Crossing into Italy, the landscape transforms, offering a different perspective of Mont Blanc. A long descent follows, leading into the charming town of Courmayeur. Courmayeur provides a welcome change with plentiful accommodation and dining options. This stage takes approximately 6-8 hours, and remember to carry your passport for border crossing! Enjoy the Italian atmosphere!

Stage 3: Courmayeur to Rifugio Bonatti

This demanding 18km stage ascends through stunning scenery towards Rifugio Bonatti, offering challenging terrain and rewarding panoramas. Leaving Courmayeur, the trail climbs steadily through forests and past alpine pastures, eventually reaching the Val Veny. The path becomes steeper as you approach the refuge, with potential for snow patches even in summer.

Rifugio Bonatti is perched high above the valley, providing breathtaking views of the Grandes Jorasses. This stage typically takes 7-9 hours, demanding good fitness and stamina. Be prepared for a significant elevation gain and potentially challenging weather conditions. Booking at Rifugio Bonatti is essential, as it’s a popular stop!

Food & Water on the Trail

Sustaining energy levels is crucial on the TMB! Refuges generally offer three-course meals (dinner & breakfast) and packed lunches, but availability can vary – pre-booking is highly recommended. Expect hearty, traditional alpine cuisine. Water sources are present, but purification tablets or a filter are essential due to potential contamination from livestock or glacial runoff.

Packing your own snacks is vital. Opt for high-energy foods like nuts, dried fruit, energy bars, and chocolate. Consider electrolyte tablets to replenish lost salts. Refuges sell drinks, but they can be expensive. Plan to carry at least 2-3 liters of water capacity, especially for longer stages with limited water sources.

Refuges Meals & Availability

Refuge meals are a highlight of the TMB experience! Typically, dinner consists of a hearty, multi-course meal – often soup, a main course with pasta or polenta, cheese, and dessert. Breakfast is a simpler affair, usually bread, jam, cheese, and coffee or tea.

Booking is absolutely essential, especially during peak season (July-August). Refuges are small and fill up months in advance. Many now have online booking systems. Availability can be unpredictable, so book as early as possible. Vegetarian and vegan options are increasingly available, but inform the refuge when booking. Packed lunches can also be ordered, providing a convenient trailside meal.

Packing Your Own Food – Energy-Rich Options

Supplementing refuge meals with your own snacks is crucial! Focus on lightweight, calorie-dense foods. Excellent choices include energy bars, trail mix (nuts, seeds, dried fruit), jerky, and chocolate. Consider dehydrated meals for lunch – they’re lightweight and easy to prepare with hot water.

Electrolyte tablets or powders are vital for replenishing salts lost through sweat. Hard candies or gels provide quick energy boosts. Don’t forget to pack enough for unexpected delays. Repackage food into ziplock bags to save space and weight. Remember to carry out all your trash – leave no trace!

Navigation & Safety

Staying safe on the TMB requires diligent preparation and awareness. The trail is generally well-marked, but conditions can change rapidly. Familiarize yourself with trail markings – typically red and white blazes, or paint. A detailed map and compass are essential, even with a GPS device.

Mountain weather is unpredictable; check forecasts daily and be prepared for all conditions. Carry a whistle, first-aid kit, and emergency blanket. Inform someone of your itinerary and check in regularly. Be aware of altitude sickness symptoms and descend if necessary. Know emergency contact numbers for the region.

Understanding Trail Markings

Successfully navigating the TMB relies on recognizing its trail markings. The most common are red and white blazes – horizontal or vertical stripes painted on rocks, trees, or posts. These indicate the official route. Look for them frequently, as sections can be obscured by snow or vegetation.

Occasionally, you’ll encounter small cairns (piles of stones) guiding the way, especially in more exposed areas. Pay attention to variations; a red blaze with a yellow top indicates a variant or alternative path. Be cautious of misleading animal trails; A good map cross-referenced with markings is crucial, and don’t hesitate to backtrack if unsure!

Mountain Weather & Emergency Procedures

Alpine weather is notoriously unpredictable. Conditions can change rapidly, even in summer, bringing rain, snow, or fog. Check the forecast daily before setting off and be prepared for all possibilities. Layering clothing is essential.

In an emergency, the European emergency number is 112. Know your location (GPS coordinates are ideal). Refuges often have emergency phones. Carry a whistle and a fully charged power bank for your phone. Inform someone of your itinerary and expected return. Be aware of altitude sickness symptoms and descend if they appear. Prioritize safety above all else!

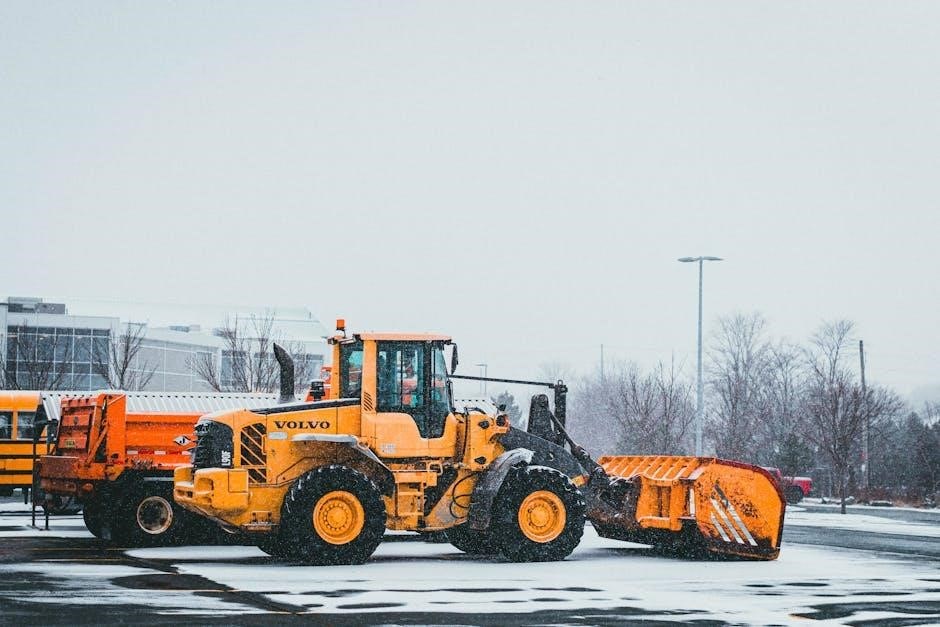
Transportation to/from the Trail

Getting to the start and from the finish requires planning. Les Houches, the typical starting point, is easily accessible from Geneva Airport (GVA) via bus (AlpyBus) or train (SNCF, requiring a change in Saint-Gervais-les-Bains). Allow 2-3 hours for travel.

From Chamonix, the finish, options include train to Saint-Gervais and onward to Geneva, or direct bus services to Geneva Airport. Consider pre-booking transport, especially during peak season. Parking in Les Houches is available but can fill quickly. Research and reserve transfers in advance for a smoother journey!

Getting to Les Houches (Starting Point)

Les Houches is conveniently reachable from Geneva Airport (GVA). The most straightforward option is the AlpyBus service, offering direct transfers and taking approximately 2.5 ⎯ 3 hours. Pre-booking is highly recommended, especially during the summer months. Alternatively, take a train from Geneva Airport to Saint-Gervais-les-Bains-Le Fayet, then a local bus or taxi to Les Houches (total travel time around 3-4 hours).

If driving, be aware that parking in Les Houches can be limited and expensive. Consider parking in Chamonix and taking a bus to Les Houches to avoid potential issues. Plan your journey in advance and check timetables for the most up-to-date information.

Returning from Chamonix (Finishing Point)

Chamonix offers excellent transport links for your departure. Geneva Airport (GVA) is the most common exit point, accessible via the AlpyBus service (approximately 3 hours) – again, pre-booking is essential. Train options are also plentiful; a direct train runs from Chamonix-Mont-Blanc station to Saint-Gervais-les-Bains-Le Fayet, connecting to services towards Geneva or Paris.

For those driving, Chamonix has several car parks, but they can fill up quickly, particularly during peak season. Consider pre-booking parking if possible. Allow ample time for your onward journey, factoring in potential traffic delays, especially on weekends. Check train and bus schedules before your final descent.

Budgeting for Your TMB Adventure

A self-guided TMB can range significantly in cost. Expect to spend roughly €80-€120 per day, depending on your choices. Refuges typically cost €60-€80 per night including half-board (dinner & breakfast), while gîtes/hotels will be more expensive (€100+). Food and drinks purchased along the trail add €20-€30 daily.

Transportation (airport transfers, buses) can add another €100-€200. Factor in map/guidebook costs (€30-€50) and potential emergency funds. A reasonable total budget for 11 days is €1100-€1500, excluding flights. Pre-booking refuges and transport can help control costs, and packing your own snacks reduces daily expenses.

Resources & Useful Websites

Planning a self-guided TMB benefits from excellent online resources. The official Tour du Mont Blanc website (tourdumontblanc.com) provides route information and accommodation listings. AllTrails (alltrails.com) offers user reviews, maps, and GPX tracks.

For refuge booking, consider websites like Refuges Info (refugesinfo.com). Outdooractive (outdooractive.com) provides detailed maps and route planning tools. Local tourist office websites (Chamonix, Courmayeur, Les Houches) offer valuable information on transport and local conditions. Don’t forget weather forecasts from MeteoFrance (meteofrance.com) for accurate mountain predictions.

denture tooth shape guide

Denture Tooth Shape Guide: A Comprehensive Overview (Updated 12/16/2025)

This guide explores denture tooth shapes, addressing aesthetics, function, and psychological impact, while considering materials and advancements like implant retention for optimal results.

Dentures, essential for restoring smiles and function after tooth loss, aren’t one-size-fits-all. The shape of denture teeth significantly impacts aesthetics, chewing efficiency, and even speech. Replacing missing teeth with removable false teeth, like dentures, requires careful consideration of tooth morphology.

Various shapes – ovoid, tapered, square, and conical – offer different visual and functional outcomes. Understanding these options is crucial for both dentists and patients. Recent research highlights the emotional toll of tooth loss, emphasizing the importance of restoring not just function, but also confidence. Partial dentures, too, benefit from thoughtful shape selection, harmonizing with existing dentition.

The Importance of Tooth Shape in Denture Aesthetics

Tooth shape profoundly influences the overall aesthetic outcome of dentures, impacting facial harmony and patient self-perception. A natural-looking smile boosts confidence, counteracting feelings of self-consciousness and shame often experienced after tooth loss. The correct shape complements facial features, restoring a youthful appearance.

Incorrect shapes can appear unnatural, detracting from the overall result. Careful consideration of age and gender-specific preferences is vital. Dentists strive to recreate the appearance of natural teeth, enhancing the patient’s quality of life. Aesthetic success directly addresses the psychological impact of tooth loss, fostering a positive self-image.

Understanding Anatomical Tooth Forms

Replicating natural tooth morphology is crucial for successful denture aesthetics and function. Natural teeth exhibit subtle variations in shape, size, and texture, contributing to a realistic appearance. Dentists utilize this as a baseline when selecting or customizing denture teeth. Understanding the anatomical forms of canines, incisors, premolars, and molars is essential.

These forms dictate chewing efficiency and speech clarity. Deviations from natural anatomy can lead to functional issues and an unnatural smile. Careful observation and replication of existing tooth structures, when possible, enhance the overall outcome and patient satisfaction.

Natural Tooth Morphology as a Baseline

Prior to denture fabrication, a thorough understanding of natural tooth morphology is paramount. This involves analyzing the subtle curves, grooves, and variations present in a patient’s remaining teeth, or referencing established dental anatomy standards. The goal is to mimic these natural features as closely as possible.

Using natural tooth forms as a baseline ensures the dentures blend seamlessly with the patient’s existing oral structures, enhancing aesthetics and function. This approach minimizes the artificial appearance and promotes comfortable chewing and clear speech. It’s the foundation for a successful and satisfying denture experience.

Common Denture Tooth Shapes

Several established tooth shapes are frequently utilized in denture construction, each offering distinct aesthetic and functional characteristics. Ovoid shapes present a softer, more rounded appearance, often favored for their natural look. Tapered shapes mimic the gradual narrowing of natural teeth, enhancing realism. Square shapes provide a bolder, more defined aesthetic, while conical shapes offer a pointed, slightly more youthful appearance.

The selection of the appropriate shape depends on individual patient needs, facial features, and desired outcome. Dentists carefully consider these factors to create dentures that are both visually appealing and functionally effective.

Ovoid Tooth Shapes

Ovoid tooth shapes, characterized by their rounded and softly contoured forms, are a popular choice for dentures aiming for a natural and gentle aesthetic. These shapes lack sharp angles, creating a more youthful and approachable appearance. They blend seamlessly with surrounding facial tissues, minimizing a potentially artificial look.

Ovoids are particularly well-suited for individuals with softer facial features or those desiring a less pronounced smile. They often contribute to a more harmonious overall facial balance, enhancing confidence and comfort for the denture wearer.

Tapered Tooth Shapes

Tapered denture teeth feature a gradual narrowing from the incisal edge to the cervical area, mimicking the natural inclination of many individuals’ teeth. This design creates a more dynamic and realistic appearance, particularly when viewed in motion during speech or chewing. They offer a balance between a defined smile and a natural look.

Tapered shapes are often favored for patients seeking a slightly more defined aesthetic without appearing overly aggressive. They can be particularly effective in restoring a youthful vitality to the smile, enhancing facial harmony and overall confidence.

Square Tooth Shapes

Square denture teeth exhibit straight, defined lines and minimal tapering, creating a bolder and more structured appearance. This shape is characterized by flat, broad surfaces and sharp angles, offering a distinctly modern aesthetic. While less common than ovoid or tapered shapes, square teeth can be a suitable choice for specific patients.

Historically, square shapes were more prevalent, but contemporary preferences lean towards more natural forms. However, they can be effective in certain cases, particularly when aiming for a strong, confident look or matching existing dentition with similar characteristics.

Conical Tooth Shapes

Conical denture teeth, as the name suggests, feature a distinct cone-like form, tapering significantly from the base to the incisal edge. This shape creates a youthful and somewhat delicate appearance, often favored for anterior teeth. They mimic the natural shape of younger, developing teeth, offering a softer aesthetic compared to square or even tapered options.

However, conical shapes require careful consideration as excessive tapering can compromise chewing efficiency. They are best suited for patients seeking a very natural, less pronounced tooth form, and often blended with other shapes for functional balance.

Materials Influencing Tooth Shape Options

The material used for denture teeth significantly impacts the achievable shapes and overall aesthetic. Acrylic denture teeth are the most common and versatile, allowing for a wide range of shapes and easy customization during fabrication and adjustments. Porcelain teeth, known for their lifelike appearance and resistance to wear, offer excellent detail but are more brittle and can cause wear on opposing natural teeth.

Composite denture teeth represent a middle ground, providing improved aesthetics and durability compared to acrylic, while being less prone to fracture than porcelain. Material choice dictates the precision and detail possible in replicating natural tooth morphology.

Acrylic Denture Teeth

Acrylic denture teeth remain the most frequently selected option due to their cost-effectiveness and ease of manipulation. They offer a broad spectrum of shapes, from ovoid to tapered, allowing for personalized aesthetics. Dentists can readily adjust acrylic teeth during the try-in phase, ensuring proper bite and comfort. While not as naturally translucent as porcelain, modern acrylics have improved in appearance.

These teeth are relatively soft, making them suitable for patients with limited opposing natural teeth, minimizing wear. However, they are more susceptible to staining and abrasion over time compared to other materials.

Porcelain Denture Teeth

Porcelain denture teeth were historically favored for their exceptional aesthetics and resistance to wear. They closely mimic the translucency and luster of natural teeth, offering a highly realistic appearance. Porcelain allows for detailed anatomical tooth forms, including subtle variations in shape and shade. However, porcelain is a brittle material.

This brittleness can lead to chipping or fracture, particularly if opposing natural teeth are present. Adjustments to porcelain teeth are more difficult and time-consuming than with acrylic, requiring specialized techniques.

Composite Denture Teeth

Composite denture teeth represent a more recent advancement, offering a balance between aesthetics and durability. These teeth are made from a resin material, providing improved impact resistance compared to porcelain, reducing the risk of chipping or fracture. Composite materials allow for a good level of customization in tooth shape and color, though perhaps not quite matching porcelain’s translucency.

They are generally easier to adjust and repair than porcelain teeth, simplifying modifications during the denture fitting process. Composite options are often more cost-effective than porcelain, making them accessible to a wider range of patients.

Shape Considerations for Upper Dentures

Upper denture tooth shapes significantly impact facial aesthetics and speech. Canine and incisor shapes often feature a more pronounced, slightly ovoid form to mimic natural teeth and support lip fullness, counteracting a collapsed facial profile post-tooth loss. A gentle taper is generally preferred for a natural appearance.

Premolars and molars in upper dentures typically exhibit a broader, more rounded shape to facilitate efficient chewing. Careful consideration of occlusal (biting) surfaces is crucial for proper function. The overall goal is to restore both form and function harmoniously.

Canine and Incisor Shapes for Upper Dentures

For upper dentures, canine and incisor shapes are paramount for aesthetics and speech. Ovoid forms are frequently chosen, mimicking natural tooth contours and providing lip support, crucial for a youthful appearance; A slight taper from incisal edge to cervical area enhances realism.

Canines often exhibit a subtle point, while incisors may have rounded or slightly squared edges. These shapes influence phonetics, aiding in clear articulation. Careful attention to shade and translucency further contributes to a natural, confident smile, addressing potential self-consciousness.

Premolar and Molar Shapes for Upper Dentures

Upper denture premolars and molars prioritize chewing efficiency and stability. Typically, these teeth feature broader, more square or tapered shapes compared to anterior teeth. This design maximizes surface area for grinding food effectively. Occlusal morphology—the biting surface—is crucial, mimicking natural cusps and grooves for proper bite alignment.

Slightly conical shapes can also be utilized, particularly for molars, to aid in guiding food during mastication. Proper shape selection contributes to balanced occlusion, preventing undue stress and ensuring long-term denture survival, enhancing overall function.

Shape Considerations for Lower Dentures

Lower denture tooth shape selection demands careful consideration due to limited support and increased functional demands. Generally, lower denture teeth are smaller and narrower than their upper counterparts, accommodating the reduced space within the mouth. A more anatomical approach is often favored, prioritizing natural-looking contours.

Shapes should facilitate proper occlusion and guide food during chewing. Achieving stability is paramount; therefore, designs that promote retention and minimize denture movement are essential. Careful planning ensures both aesthetics and functional success for lower dentures.

Canine and Incisor Shapes for Lower Dentures

For lower dentures, canine and incisor shapes are crucial for both aesthetics and function. Incisors typically exhibit a slightly tapered or ovoid form, avoiding overly square or bulky appearances. Canines should possess a subtle cusp to guide lateral movements during chewing, preventing excessive stress on the denture base.

A natural emergence profile is vital, mimicking the way teeth rise from the gums. These shapes contribute to proper speech and a confident smile. Avoiding exaggerated features ensures a harmonious blend with facial contours and overall denture acceptance.

Premolar and Molar Shapes for Lower Dentures

Lower denture premolars and molars require careful shaping to maximize chewing efficiency. Generally, these teeth feature broader, more robust forms compared to anterior teeth, with well-defined cusps and grooves. The occlusal surfaces should replicate natural tooth anatomy, facilitating effective grinding and crushing of food.

Slight tapering towards the cervical region aids in self-cleansing. Avoiding overly flat or rounded molars prevents premature wear and maintains proper vertical dimension. Accurate shape contributes to stability and minimizes stress on the supporting tissues, enhancing long-term denture success.

The Impact of Tooth Shape on Function

Denture tooth shape profoundly influences both chewing efficiency and speech clarity. Properly shaped teeth with appropriate cusp angles and occlusal surfaces enable effective food breakdown, preventing discomfort and digestive issues. Incorrect shapes can lead to uneven pressure, instability, and reduced chewing force.

Furthermore, tooth shape impacts articulation. Accurate incisal edges and proper tooth positioning facilitate clear pronunciation of sounds like ‘f’ and ‘v’. Poorly designed dentures can cause slurring or difficulty forming certain words, affecting confidence and communication.

Chewing Efficiency and Tooth Shape

Optimal chewing relies heavily on denture tooth shape, specifically cusp form and occlusal surface design. Well-defined cusps guide food into proper position for grinding, maximizing contact and force distribution. A balanced occlusion, achieved through carefully selected shapes, prevents localized stress and ensures efficient breakdown of food particles.

Shapes mimicking natural teeth generally offer superior chewing function. Conversely, flat or poorly contoured teeth diminish chewing effectiveness, potentially leading to discomfort, food impaction, and even temporomandibular joint issues. Proper shape selection is crucial for restoring a functional and comfortable bite.

Speech Clarity and Tooth Shape

Denture tooth shape significantly impacts speech, particularly the articulation of sounds requiring precise tongue-to-tooth contact. Incisal edges – the biting surfaces of front teeth – play a vital role in producing fricative sounds like ‘f’ and ‘v’. Incorrect shaping can lead to slurring or distortion of these sounds, causing frustration and communication difficulties.

Anatomical tooth forms, closely resembling natural dentition, generally promote clearer speech. The positioning and contours of teeth influence airflow and tongue placement. Careful consideration during denture fabrication minimizes speech impediments, restoring natural communication patterns and improving quality of life.

Age and Gender Considerations in Tooth Shape Selection

Tooth shape preferences evolve with age and differ between genders, influencing aesthetic outcomes. Younger patients often prefer brighter, more prominent teeth, while older individuals may opt for a more subdued, natural appearance reflecting wear over time; Gender plays a role too; generally, women favor softer, more rounded shapes, while men sometimes prefer slightly more defined, square forms.

Dentists consider these factors alongside facial features and existing dentition. Addressing self-consciousness related to tooth loss is crucial, tailoring shapes to boost confidence and restore a youthful, natural smile appropriate for each individual.

Tooth Shape Preferences by Age Group

Younger adults (20s-40s) frequently desire brighter, whiter teeth with a more pronounced shape, often leaning towards ovoid or slightly tapered forms for a modern aesthetic. Middle-aged individuals (40s-60s) typically seek a balance – natural-looking shapes with moderate brightness, favoring tapered or gently rounded designs.

Older adults (60+) generally prefer more realistic, worn appearances, often opting for softer, less defined shapes like rounded or slightly square forms to complement age-related facial changes and avoid an unnatural look. These preferences impact denture design significantly.

Gender-Specific Tooth Shape Aesthetics

Generally, women often prefer softer, more rounded tooth shapes for their dentures, with a focus on creating a feminine smile. Slightly ovoid or tapered incisors are common choices, enhancing perceived youthfulness and attractiveness. Men, conversely, tend towards more defined and square tooth shapes, projecting strength and maturity.

However, these are generalizations; individual preferences vary greatly. Dentists consider facial structure and personality when selecting shapes. Subtle variations in canine prominence and incisor width can significantly impact the overall aesthetic outcome, catering to individual gender expression.

Partial Denture Tooth Shape Considerations

When fabricating partial dentures, seamlessly matching the existing tooth morphology is paramount for a natural appearance. Dentists meticulously analyze the shape, size, and shade of remaining teeth to replicate these characteristics in the prosthetic replacements. This ensures harmonious integration and avoids creating an obvious distinction between natural and artificial teeth.

Careful consideration is given to occlusal relationships and ensuring proper bite alignment. The chosen tooth shapes must complement the function of the remaining dentition, preserving chewing efficiency and preventing undue stress on adjacent teeth. Material selection also influences shape options and aesthetics.

Matching Existing Tooth Morphology

Achieving a natural aesthetic with partial dentures hinges on precisely matching the shape of the remaining teeth. This involves a detailed assessment of each tooth’s unique characteristics – its contours, grooves, and overall form. Dentists utilize advanced techniques and materials to replicate these nuances, ensuring a seamless blend between the natural and prosthetic components.

Successful morphological matching minimizes visual discrepancies and enhances the patient’s confidence. It’s not simply about selecting a generic tooth shape; it’s about creating a customized restoration that harmonizes with the individual’s existing dentition, restoring both function and a natural-looking smile.

The Role of the Dentist in Tooth Shape Selection

The dentist plays a pivotal role in guiding tooth shape selection, extending beyond mere functionality to encompass facial aesthetics. A comprehensive evaluation considers the patient’s facial structure, lip support, and overall smile design. Dentists leverage their expertise to recommend shapes that complement these features, restoring a youthful and balanced appearance.

This process involves open communication with the patient, understanding their preferences, and addressing any concerns regarding self-consciousness or shame related to tooth loss. The dentist’s skill ensures the chosen shapes not only look natural but also contribute positively to the patient’s self-esteem and quality of life.

Facial Aesthetics and Tooth Shape

Tooth shape profoundly impacts facial aesthetics, influencing how the lips and cheeks are supported. Properly selected shapes restore lost volume, mitigating the sunken appearance often associated with tooth loss. A dentist considers the patient’s unique facial contours, aiming for harmony between the dentures and existing features.

Specific shapes can address concerns like a collapsed bite or diminished lip support. For instance, fuller shapes may provide better lip projection, while tapered shapes can create a more natural smile line. Ultimately, the goal is to enhance the patient’s overall appearance and confidence, restoring a youthful and vibrant look.

Psychological Impact of Denture Tooth Shape

Tooth loss significantly impacts self-esteem, often leading to feelings of self-consciousness and shame. Recent research highlights the emotional challenges patients face, including fear of social interaction due to altered appearance. Selecting the right denture tooth shape is crucial for addressing these psychological concerns.

Aesthetically pleasing dentures can restore confidence and improve quality of life. Patients report feeling more comfortable smiling, speaking, and engaging socially when they are happy with their dentures’ appearance. Dentists must consider patient preferences and address any anxieties to ensure a positive outcome and emotional well-being.

Addressing Self-Consciousness and Shame

Patients experiencing self-consciousness or shame related to tooth loss require empathetic and comprehensive care. Open communication is vital; dentists should actively listen to patient concerns and validate their feelings. Discussing realistic expectations for denture aesthetics and function can alleviate anxiety.

Careful tooth shape selection plays a key role in restoring confidence. Choosing shapes that complement facial features and resemble natural teeth can significantly improve self-perception. Providing before-and-after visuals and offering try-in dentures allows patients to visualize the potential outcome, fostering a sense of control and reducing apprehension.

New Research on Patient Emotional Challenges

Recent research from the University of Sheffield highlights previously underestimated emotional burdens experienced by individuals following tooth loss. Studies reveal patients often grapple with feelings of self-consciousness, shame, and even fear, impacting their quality of life. These aren’t merely cosmetic concerns; they represent significant psychological distress.

Beyond physical sensations, the research emphasizes the social impact of tooth loss. Patients report avoiding smiling, social interactions, and certain foods due to embarrassment or discomfort. Understanding these emotional challenges is crucial for dentists to provide holistic care, addressing not just the functional aspects of dentures but also the patient’s emotional wellbeing.

Implant-Retained Denture Tooth Shape Options

Implant-retained dentures offer enhanced stability and broadened aesthetic possibilities regarding tooth shape selection. Unlike conventional dentures, implants minimize bone resorption, preserving facial structure and allowing for more natural-looking tooth forms. Dentists can utilize a wider range of shapes – ovoid, tapered, or even more customized designs – with greater confidence in long-term success.

The increased retention also allows for more aggressive shaping of anterior teeth, improving lip support and smile aesthetics. Patients generally report higher satisfaction with implant-supported dentures, appreciating both the functional benefits and the improved confidence stemming from a more natural and secure smile.

Stability and Aesthetics with Implants

Implant-retained dentures dramatically improve both stability and aesthetics compared to traditional options. Implants anchor the denture, eliminating slippage and providing a secure bite, which directly impacts the achievable tooth shapes. Greater stability allows for more natural occlusal (biting) surfaces and realistic tooth contours.

Aesthetically, implants support the lip and cheek structure, preventing the sunken appearance often associated with denture wear. This allows for a wider range of tooth shape choices, enhancing the smile’s natural beauty and restoring facial harmony. Patients experience improved confidence and quality of life with these benefits.

Long-Term Survival Rates of Denture Shapes

Long-term denture survival varies significantly between maxillary (upper) and mandibular (lower) dentures. Research consistently demonstrates that maxillary dentures exhibit higher survival rates due to greater surface area and bone support. Mandibular dentures, facing challenges with stability and bone resorption, often require more frequent replacements or relining.

Tooth shape itself doesn’t directly impact survival, but its influence on function does. Shapes promoting efficient chewing reduce stress on the denture base. Implant-retained dentures show substantially improved longevity compared to conventional options, regardless of tooth shape, offering enhanced stability and support.

Maxillary vs. Mandibular Denture Longevity

Maxillary dentures generally demonstrate superior longevity compared to their mandibular counterparts. This difference stems from the broader surface area and greater bone support available in the maxilla, providing enhanced retention and stability. Mandibular dentures, conversely, are more susceptible to movement and bone resorption, leading to reduced lifespan.

Studies indicate a five-year survival rate of around 60-70% for maxillary dentures, while mandibular dentures typically fall between 40-50%. Implant support dramatically improves mandibular denture longevity, often exceeding 80% over five years, effectively bridging the gap in survival rates.

Future Trends in Denture Tooth Shape Design

The future of denture tooth shape design is rapidly evolving, driven by digital technologies and a deeper understanding of patient-specific needs. Digital denture design and customization are poised to revolutionize the field, allowing for precise tooth placement and morphology tailored to individual facial structures and aesthetic preferences.

Expect to see increased use of CAD/CAM systems for creating highly accurate dentures with optimized tooth shapes. Artificial intelligence (AI) may also play a role, predicting optimal shapes based on facial analysis and biomechanical principles, ultimately enhancing both function and aesthetics.

Digital Denture Design and Customization

Digital denture design represents a paradigm shift, moving away from traditional methods towards precision and personalization. Utilizing intraoral scanners and CAD/CAM software, dentists can create virtual models of the patient’s mouth, enabling accurate tooth positioning and shape customization. This technology allows for previewing the final result before fabrication, ensuring patient satisfaction.

Customization extends beyond aesthetics; digital workflows facilitate optimizing occlusal surfaces for improved chewing efficiency. Furthermore, digital design streamlines the fabrication process, reducing errors and turnaround times, ultimately delivering superior dentures tailored to each individual’s unique anatomy and desires.

alchemy guide ffxi

Alchemy Guide FFXI: A Comprehensive Plan (12/16/2025)

Embark on a transformative journey, mastering the art of substance creation within Vana’diel! This comprehensive guide, updated today, December 16th, 2025, will illuminate your path.

Alchemy empowers creation of vital medicines, dangerous poisons, and substances brimming with ethereal power, offering a unique role within Vana’diel’s intricate ecosystem and economy.

Alchemy’s Role in Vana’diel

Within the expansive world of Vana’diel, Alchemy occupies a crucial niche, extending far beyond simple potion brewing. Alchemists are the architects of essential consumables, directly impacting adventurers’ survivability and effectiveness. They craft potent medicines to restore health, powerful poisons for strategic combat, and specialized items enhancing various skills. This craft isn’t merely supportive; it’s integral to the economic engine, with high demand for crafted goods.

The ability to synthesize items allows players to circumvent reliance on monster drops or expensive merchant purchases; Mastering Alchemy provides self-sufficiency and a lucrative trade skill. Furthermore, advanced alchemists contribute to party dynamics, supplying crucial buffs and debuffs. The demand for paralysis potions, for example, remains consistently high, demonstrating Alchemy’s enduring relevance. Ultimately, an Alchemist’s skill directly translates to power and prosperity within Vana’diel.

Essential Tools and Setup

Beginning your alchemical journey requires minimal initial investment, focusing on accessibility. A crucial starting point is acquiring an Alchemy Guild Certificate, granting access to guild-specific items vital for early skill-ups. Beyond this, a basic toolkit is sufficient: a synthesizer (purchased from Alchemy Guilds), and a readily available supply of crystals – Water, Fire, Light, and Earth – form the foundation.

While not strictly essential initially, investing in a Kitron Macaron early on proves invaluable for guaranteed skill-ups, especially during lower levels. Storage is also key; ample inventory space prevents interruptions during synthesis. As you progress, consider acquiring specialized tools for refining efficiency. Remember, consistent access to guild items and a steady supply of basic crystals are paramount for a smooth start to your alchemical endeavors.

Understanding Skill Ups and Formula Acquisition

Alchemy skill progression in FFXI relies on successful syntheses, with skill-ups becoming increasingly challenging at higher levels. Utilizing Kitron Macaron provides a guaranteed skill-up, crucial for navigating difficult jumps, particularly before level 70. However, relying solely on macarons isn’t cost-effective long-term. Early formulas are automatically learned upon joining the Alchemy Guild, but expanding your repertoire requires diligent effort.

Formulas are primarily obtained through Guild Tests, demanding specific item submissions. Successful completion unlocks new recipes. Experimentation is also key; attempting syntheses, even failures, can occasionally reveal hidden formulas. Remember that pre-level 70 synthesis often guarantees skill-ups, allowing you to efficiently progress with cheaper recipes. Mastering this balance – strategic macaron use and formula acquisition – is vital for alchemical mastery.

II. Leveling Alchemy: Early Stages (Levels 0-30)

Begin your alchemical journey with basic syntheses, progressing through guild items, and ultimately mastering Chunk of Rock Salt and Tsurara combinations efficiently.

Level 0-10: Basic Synthesis

The initial levels of alchemy focus on establishing a foundation through repetitive, yet crucial, basic syntheses. Prioritize crafting items like potions and powders, even if they aren’t immediately profitable. The primary goal here isn’t gil, but consistent skill-ups. Utilize readily available and inexpensive ingredients to minimize costs during this phase.

Remember, every synthesis attempt, successful or not, contributes to your overall skill progression. Don’t shy away from failures; they are a natural part of the learning process. Continuously synthesize the same item until you consistently achieve successful results, indicating a solid grasp of the fundamentals. Always consider using Kitron Macaron to guarantee skill-ups, especially when facing difficult syntheses or aiming for rapid advancement. This early dedication will pave the way for more complex and rewarding alchemical endeavors.

Level 10-20: Utilizing Guild Items

As you progress to levels 10-20, incorporating guild items into your synthesis routine becomes incredibly efficient. Guild test items offer a reliable pathway to skill-ups, often guaranteeing success within this level range. These items are specifically designed to aid in leveling, providing a consistent and predictable outcome. Focus on acquiring and utilizing these resources to accelerate your alchemy progression.

However, be mindful that guild items aren’t a limitless resource. Supplement their use with continued synthesis of basic potions and powders, maintaining a balance between guaranteed skill-ups and practical crafting experience. Remember that synthesizing pre-level 70 often guarantees a skill-up, so cheap synths are valuable. This strategic approach will maximize your efficiency and prepare you for the challenges of mid-level alchemy.

Level 20-30: Chunk of Rock Salt & Tsurara Synthesis

Between levels 20 and 30, the synthesis of Chunk of Rock Salt combined with Tsurara emerges as a pivotal strategy for both skill advancement and modest profit generation. This combination provides a relatively inexpensive and consistently successful synthesis route. Expect an average outcome, with each successful craft yielding a small profit margin, approximately 332 gil per synthesis, based on current market values as of December 16th, 2025.

The total cost for this synthesis is around 1,224 gil for a jar of black, highlighting the accessibility of this method. Prioritize acquiring a steady supply of both Chunk of Rock Salt and Tsurara to maintain a consistent crafting flow. This method is a cornerstone for building momentum during this crucial leveling phase, preparing you for more complex and lucrative formulas.

III. Mid-Level Alchemy (Levels 30-60)

Progressing from 30 to 60 unlocks opportunities for profit and skill refinement, focusing on Flask of Boiling Oil and, crucially, mastering Paralysis Potion synthesis.

Level 30-40: Flask of Boiling Oil & Early Profit Making

The 30-40 level range in FFXI Alchemy presents a fantastic opportunity to establish a consistent income stream through the synthesis of Flask of Boiling Oil. This item enjoys steady demand from various players, particularly those engaging in early-game content and skirmishes. Focus on efficiently acquiring the necessary ingredients – typically Water Crystals and Sulfur – and optimizing your synthesis attempts for HQ (High Quality) results.

While not exceptionally lucrative, the consistent sales of Flask of Boiling Oil provide a reliable foundation for building capital. Remember to monitor market prices and adjust your selling strategy accordingly. This period also serves as excellent practice for refining your synthesis skills and understanding the nuances of ingredient quality. Don’t underestimate the value of consistent, small profits during these formative levels!

Level 40-50: Artificial Lens Synthesis

As you progress from level 40 to 50, the Artificial Lens becomes a key synthesis target for Alchemists. This item, crafted using Fire Crystals and Glass Fiber, is primarily utilized to bridge a nine-level skill gap, making it popular among players rapidly advancing their crafting professions. However, it’s important to note that this synthesis doesn’t stack efficiently, so its primary benefit lies in quickly overcoming that level hurdle.

Consider combining the synthesis with a Light Crystal and two more Glass Fibers for a slightly different approach. While the profit margins aren’t substantial, the consistent demand and relatively straightforward recipe make it a viable option for skill-up experience and modest gil gains. Focus on maximizing HQ rates to increase profitability and maintain a steady supply for the market.

Level 50-60: Focusing on Paralysis Potions

Between levels 50 and 60, the Paralysis Potion emerges as a highly profitable and efficient synthesis option for Alchemists. This potent concoction, requiring Water Crystals, Paralysis Dust, and Mercury, consistently experiences strong market demand due to its utility in various high-level content. While some may anticipate Anima usage at this stage, its effectiveness caps around level 75, making it less crucial during this specific level range.

Prioritize maximizing your HQ rates for Paralysis Potions, as the higher quality versions command significantly better prices. Consistent production and strategic market monitoring will yield substantial gil returns. This period is ideal for establishing a reliable income stream and solidifying your alchemy skills.

IV. Advanced Alchemy (Levels 60-80)

Refine your techniques and embrace complexity; this stage demands precision and strategic resource management for optimal synthesis and substantial profit gains.

Level 60-70: Refining Synthesis Strategies

Reaching levels 60 to 70 in FFXI alchemy necessitates a shift from simple, repetitive syntheses to more nuanced strategies. Focus shifts towards maximizing skill-ups while simultaneously considering potential profit. This is where understanding synthesis rates becomes crucial; consistently aiming for HQ (High Quality) items is paramount, even if it means slightly increased ingredient costs.

During this phase, prioritize refining your understanding of how different crystals and dusts interact. Experimentation is key, but always be mindful of the cost-benefit ratio. While Anima usage begins to become viable, its effectiveness is capped at level 75, so don’t rely on it exclusively. Consider focusing on items with consistent demand, even if the profit margin isn’t exceptionally high, to ensure steady skill progression. Remember to continually evaluate market trends!

Level 70-80: Mastering Paralysis Potions & Anima Usage

The 70-80 level bracket in FFXI alchemy is largely defined by the dominance of Paralysis Potions. This period demands efficient synthesis of these potions, utilizing Water Crystals, Paralysis Dust, and Mercury as core components. Don’t anticipate significant skill-ups from Anima usage at this stage, as its benefits plateau around level 75. However, strategically employing Anima can still contribute to faster progression.

Refine your ingredient sourcing to minimize costs, as the sheer volume of potions synthesized will quickly impact profitability. Focus on consistently producing HQ Paralysis Potions to maximize sales value. Explore alternative synthesis methods and experiment with different crystal combinations to optimize skill-up rates. Remember, consistent practice and market awareness are vital for success during this crucial leveling phase.

V. Alchemy Beyond Level 80

Ascend to the pinnacle of alchemical mastery, crafting high-level potions and refining techniques for ultimate efficiency and maximizing your hard-earned skill!

Level 80-90: High-Level Potion Synthesis

Reaching levels 80 to 90 unlocks the potential for synthesizing truly potent potions, demanding refined skills and strategic ingredient sourcing. Focus shifts towards complex recipes requiring rarer components, offering substantial gil profits if executed efficiently. Expect to heavily utilize Water Crystals, alongside specialized dusts like those for Paralysis or Sleep, depending on current market demands.

This stage necessitates a deep understanding of synthesis checks and the effective use of skill-enhancing items. While Anima becomes increasingly valuable, careful management is crucial. Prioritize potions with consistent demand, such as those used in high-end content or by dedicated job classes. Don’t underestimate the value of HQ (High Quality) items, as they fetch significantly higher prices. Mastering this level range is about maximizing both skill gains and profitability through meticulous planning and execution.

Level 90-100: Maximizing Skill and Efficiency

The final stretch, levels 90 to 100, centers on perfecting alchemy and achieving peak efficiency. Skill-ups become increasingly challenging, demanding consistent HQ synthesis and strategic use of Kitron Macaron – a staple for alchemists throughout their journey. Focus on recipes with minimal skill-up chance, maximizing your return on investment.

At this stage, mastering complex formulas and optimizing ingredient costs are paramount. Explore niche markets and identify opportunities for exclusive potion creation. Refine your understanding of synthesis assistants and utilize them effectively. Remember, consistent practice and meticulous attention to detail are key to reaching and maintaining a perfect alchemy skill. This is where dedication truly translates into substantial gil and mastery of the craft.

VI. Key Alchemy Formulas & Ingredients

Essential components include Water, Fire, Light, and Earth crystals, alongside vital dusts like Paralysis, Poison, and Sleep – foundational for potent concoctions!

Essential Crystals: Water, Fire, Light, Earth

Crystals form the bedrock of nearly all alchemical syntheses, acting as the core energy source for your creations. Water Crystals are frequently utilized in early-to-mid level potions, notably the Paralysis Potion, and are readily available through various means. Fire Crystals are crucial for items requiring heat or explosive properties, like certain oils and powders. Light Crystals contribute to restorative and purifying effects, often found in healing concoctions and antidotes;

Earth Crystals, while less common in basic recipes, become increasingly important in higher-level synthesis, lending stability and potency to complex formulas. Acquiring these crystals efficiently is paramount; consider farming locations, market purchases, and even refining lower-quality crystals to improve your yield. Understanding each crystal’s inherent properties and how they interact with other ingredients is key to mastering alchemy.

Important Dusts: Paralysis, Poison, Sleep

Dusts introduce specialized effects into your alchemical creations, dictating the nature of the potion or substance you produce. Paralysis Dust is arguably the most sought-after, essential for crafting potent Paralysis Potions – a staple for many adventurers. Mastering its acquisition and efficient use is crucial for profit. Poison Dust, while less universally demanded, finds its niche in offensive concoctions and specialized applications.

Sleep Dust offers utility for crowd control and strategic advantages, though its demand fluctuates. Sourcing these dusts often involves defeating specific monsters or purchasing them from other players. Remember that dust quality impacts synthesis success and potency; prioritize higher-quality dusts whenever possible. Careful management of your dust inventory is vital for consistent production.

Utilizing Kitron Macaron for Skill Ups

Kitron Macaron is an alchemist’s best friend, particularly during the leveling process. This readily available item guarantees a skill-up with almost every synthesis attempt, making it invaluable for rapidly increasing your Alchemy skill. Prioritize using Kitron Macaron for lower-level syntheses, effectively “riding” cheap synths as far as possible. This minimizes gil expenditure while maximizing skill gains.

However, be aware that its effectiveness diminishes at higher levels, capping around level 75. Beyond this point, focus shifts to more complex formulas and Anima utilization. Always keep a substantial stock of Kitron Macaron on hand, especially when embarking on extended leveling sessions. It’s a cost-effective method to accelerate your progress and unlock advanced recipes.

VII. Profit Making Strategies for Alchemists

Maximize your gil through astute market analysis, identifying high-demand items and optimizing ingredient sourcing for substantial profit margins within Vana’diel’s economy.

Identifying Market Demand

Successfully navigating the Vana’diel marketplace requires diligent observation and adaptation. Alchemists should consistently monitor auction house trends, paying close attention to frequently purchased items and those with consistently high prices. Paralysis Potions, a staple for many adventurers, often maintain strong demand, particularly during peak playing hours. However, competition can be fierce.

Consider analyzing server-specific needs; some servers may experience shortages of specific items due to player activity or event participation. Utilizing websites and community forums dedicated to FFXI market data can provide valuable insights. Don’t overlook the impact of job-related demands – certain classes consistently require specific consumables. Finally, be prepared to adjust your production focus based on fluctuating prices and emerging opportunities, ensuring consistent profitability.

Optimizing Ingredient Costs

Maximizing profit in FFXI alchemy hinges on securing ingredients at the lowest possible price. Regularly compare prices across auction houses and player shops, factoring in travel costs. Consider gathering your own ingredients when feasible, particularly common items like herbs and ores, though time investment must be weighed.

Bulk purchasing can often yield discounts, but avoid overstocking perishable components; Utilize crafting skills like botany and mining to supplement your supply. Don’t underestimate the value of utilizing guild item provisions when leveling, as they significantly reduce initial costs. Furthermore, explore opportunities to purchase ingredients during off-peak hours when competition is lower. Efficient ingredient management is crucial for sustained profitability.

ez66 guide

EZ66 Guide: Comprehensive Troubleshooting & Recovery

This guide offers detailed steps for resolving boot issues on EZ66 devices, covering hardware, software, and firmware, as of December 16, 2025.

The EZ66 is a versatile computing device, but like all systems, it can encounter boot failures. These issues manifest in various ways, most commonly as a “No Bootable Device” error, or messages indicating an inability to find a valid operating system. This often presents as a black screen upon startup, halting the device before the operating system loads. Several factors can contribute to these problems, ranging from simple connectivity issues with external devices to more complex hardware malfunctions or software corruption.

Understanding the potential causes is crucial for effective troubleshooting. Initial steps involve verifying basic connections and eliminating external interference. However, persistent boot failures often necessitate deeper investigation into the device’s firmware, storage components, and operating system integrity. This guide aims to provide a comprehensive approach to diagnosing and resolving these boot-related challenges on your EZ66.

Understanding the “No Bootable Device” Error

The “No Bootable Device” error signifies that the EZ66’s firmware cannot locate a valid operating system to initiate the startup process. This doesn’t necessarily indicate a catastrophic failure; it simply means the system is unable to find instructions on what to do next. Common causes include a disconnected or faulty SSD, incorrect boot order settings within the UEFI/BIOS, or a corrupted bootloader. External USB devices can also interfere, prompting the system to search for a boot sector on those drives instead of the internal storage.

The error message appears across various EZ66 models (A, B, and C) and similar Surface devices, suggesting a fundamental issue in the boot sequence. Resolving this requires systematically eliminating potential causes, starting with the simplest solutions like disconnecting peripherals and checking power connections, before moving to more advanced troubleshooting steps involving firmware updates and recovery drives.

Identifying the Root Cause

Pinpointing the source of the “No Bootable Device” error requires examining potential hardware failures, software corruption, and underlying firmware problems within the EZ66.

Hardware Failures: SSD, Connectors, and Motherboard

A primary cause of boot failures in the EZ66 stems from hardware malfunctions. The Solid State Drive (SSD) itself could be defective, exhibiting complete failure or intermittent read/write errors preventing system startup. Equally important is inspecting the physical connectors – both within the device and on any external storage – for looseness, corrosion, or damage.

A poorly seated SSD or a damaged connector can interrupt the crucial data pathway needed for booting. Finally, though less common, a failure on the motherboard represents a severe issue. This could involve damaged components related to storage control or the BIOS/UEFI chip itself. Thoroughly check all connections and consider professional diagnostics if SSD or connector issues are ruled out, as motherboard repairs are complex.

Software Corruption: Bootloader and Operating System

Software-related boot failures often involve corruption within the bootloader or the operating system itself. The bootloader, responsible for initiating the OS loading process, can become damaged due to improper shutdowns, malware, or failed updates. This prevents the EZ66 from even beginning to load the operating system.

Operating system corruption can arise from similar causes – sudden power loss during writes, faulty updates, or disk errors. This can manifest as a “No Bootable Device” error even if the hardware is functioning correctly. Attempting a system restore or reinstalling the operating system from a recovery drive are common solutions. Regularly backing up your system can mitigate the impact of such corruption, allowing for a quicker recovery.

Firmware Issues: BIOS/UEFI Problems

The EZ66’s BIOS or UEFI firmware manages the initial hardware initialization and boot process. Corrupted or outdated firmware can lead to boot failures, including the dreaded “No Bootable Device” error. Firmware corruption can occur during an interrupted update or due to a hardware malfunction.

Attempting to reset the UEFI to factory defaults via the setup menu is a first step. If that fails, a firmware recovery process, often involving a specific key combination during startup and a USB drive with the correct firmware image, may be necessary. Always ensure the firmware is specifically designed for your EZ66 model to avoid further complications. Incorrect firmware flashing can render the device unusable.

Preliminary Troubleshooting Steps

Begin with simple checks: disconnect all USB devices, perform a forced shutdown followed by a restart, and verify the power supply connections are secure.

Disconnecting External USB Devices

A frequently overlooked initial step in troubleshooting “No Bootable Device” errors on the EZ66 is to completely disconnect all external USB peripherals. This includes USB mice, keyboards, external hard drives, flash drives, and any other USB-connected devices. The EZ66, like many systems, may attempt to boot from a USB device if one is connected, even if it’s not bootable.

This can lead to the frustrating “No Bootable Device” message, even if the internal SSD is perfectly functional. Carefully unplug each USB device, ensuring a clean disconnection. After disconnecting all external USB devices, attempt to restart the EZ66. This simple action often resolves the issue, allowing the system to boot from its internal storage. Remember to test booting the device without any USB devices connected before proceeding to more complex troubleshooting steps.

Performing a Forced Shutdown and Restart

If a standard shutdown or restart fails to resolve the “No Bootable Device” error on your EZ66, a forced shutdown and restart can sometimes clear temporary glitches. This process involves holding down the power button for an extended period – typically 10-15 seconds – until the device completely powers off.

Avoid simply pressing the power button briefly, as this may not fully interrupt the boot process. Once the EZ66 is completely powered off, wait a few seconds, then press the power button again to restart it. This forces a complete reset of the system’s hardware and can resolve issues caused by software hangs or corrupted temporary files. It’s a basic, yet surprisingly effective, troubleshooting step before attempting more advanced recovery methods.

Checking Power Supply and Connections

A seemingly simple oversight – inadequate power or loose connections – can often be the culprit behind a “No Bootable Device” error on your EZ66. Ensure the power adapter is securely connected to both the device and a functioning wall outlet. Try a different outlet to rule out a power source issue.

Inspect the power cable for any signs of damage, such as fraying or exposed wires. If using a power strip or surge protector, verify it’s switched on and functioning correctly. For desktop EZ66 models, check the internal power supply connections if you’re comfortable doing so. A stable and sufficient power supply is crucial for proper booting and operation; a weak or intermittent connection can prevent the device from recognizing the bootable drive.

Advanced Recovery Methods

When preliminary steps fail, accessing UEFI/BIOS, utilizing diagnostic toolkits, and creating bootable USB recovery drives become essential for EZ66 restoration.

Accessing the UEFI/BIOS Setup

Entering the UEFI/BIOS setup is crucial for advanced troubleshooting and configuration changes on your EZ66 device. The process typically involves pressing a specific key repeatedly during the boot sequence.

Common keys include Delete, F2, F12, or Esc, but the exact key varies depending on the EZ66 model. Watch for a brief message on the screen during startup indicating the correct key to press.

If you miss the window, simply restart your EZ66 and try again. Once in the UEFI/BIOS, you can check boot order, hardware settings, and potentially reset to factory defaults. Be cautious when making changes, as incorrect settings can prevent your device from booting.

Document any alterations made for easy reversion if necessary.

Using the Surface Diagnostic Toolkit

The Surface Diagnostic Toolkit is a valuable resource for identifying and resolving common hardware and software issues on EZ66 devices. This toolkit performs a series of tests to assess the health of your system, including checks for firmware updates, driver compatibility, and hardware failures.

Download the latest version of the toolkit from the official EZ66 support website and run it as an administrator. The toolkit will guide you through the diagnostic process, providing detailed reports on any detected problems.

Follow the recommended solutions provided by the toolkit to address the identified issues. It can automatically fix certain problems or provide links to relevant support articles.

Regularly running the toolkit can help prevent future boot failures.

Creating a Bootable USB Recovery Drive

If preliminary troubleshooting fails, creating a bootable USB recovery drive is a crucial step towards restoring your EZ66 device. This allows you to bypass the corrupted operating system and initiate a system recovery. You’ll need a USB drive with at least 8GB of storage and a working computer with internet access.

Download the EZ66 recovery image from the official support website. Use the EZ66 recovery image tool to format the USB drive and copy the recovery files onto it.

Ensure the USB drive is properly inserted, then power on your EZ66 while holding the designated key (usually Volume Up or a specific power button combination) to boot from the USB drive; Follow the on-screen instructions to begin the recovery process.

Data Recovery Considerations

Prioritize backing up your data before attempting any recovery procedures, as these processes can potentially lead to data loss on your EZ66 device.

Attempting Data Backup Before Recovery

Before initiating any recovery steps on your EZ66, attempting a data backup is paramount, even if the system isn’t fully booting. Data loss is a significant risk during recovery processes, and a recent backup can mitigate this. If possible, try booting into a recovery environment or utilizing another computer to access the EZ66’s storage.

Consider creating a bootable USB drive with data recovery tools. These tools can often access files even when the operating system is inaccessible. If the EZ66 partially boots, immediately copy critical files to an external drive. Prioritize documents, photos, videos, and any irreplaceable data.

If the device won’t boot at all, professional data recovery services might be the only option. They possess specialized equipment and expertise to retrieve data from failing drives, but these services can be costly. Always weigh the value of the data against the recovery expenses.

Professional Data Recovery Services

When DIY recovery attempts fail, or the EZ66 exhibits severe hardware damage, professional data recovery services become essential. These specialized companies possess cleanroom environments and advanced tools to safely access and retrieve data from physically damaged storage devices, like SSDs. They can handle complex issues such as head crashes, platter damage, and controller failures.

Reputable services offer a free diagnostic evaluation to assess the extent of the damage and provide a cost estimate. Be sure to inquire about their success rates, data confidentiality policies, and “no data, no fee” options. Expect these services to be expensive, potentially ranging from several hundred to thousands of dollars, depending on the complexity of the recovery.

Thoroughly research potential providers, reading reviews and verifying their credentials. Prioritize companies with experience specifically with EZ66 devices or similar SSD-based systems for optimal results.

Specific EZ66 Models & Known Issues

Each EZ66 model (A, B, and C) presents unique challenges; firmware updates, SSD compatibility, and common boot failures require tailored troubleshooting approaches.

EZ66 Model A: Common Boot Failures

EZ66 Model A frequently exhibits “No Bootable Device” errors, often stemming from a loose SSD connection or a corrupted bootloader. Users report intermittent failures, particularly after Windows updates or unexpected shutdowns. A common scenario involves the device powering on, displaying the Surface logo, then reverting to a black screen with the error message. Initial troubleshooting should focus on disconnecting all USB peripherals, as the system may attempt to boot from an invalid source. A forced shutdown (holding the power button for 30 seconds) followed by a restart can sometimes resolve temporary glitches. If the issue persists, accessing the UEFI/BIOS setup is crucial to verify SSD detection and boot order. Furthermore, attempting a system restore from a USB recovery drive is often necessary to repair the bootloader or revert to a previous working state. In some cases, a complete Windows reinstallation may be required, emphasizing the importance of data backups.

EZ66 Model B: Specific Firmware Updates

EZ66 Model B has experienced boot failures specifically linked to firmware updates released between October and November 2025. Several users reported a “No Bootable Device” error immediately after installing update version 3.14.2. The issue appears to be related to an incompatibility between the updated UEFI/BIOS and certain SSD configurations. Microsoft released a hotfix (version 3.14.3) addressing this problem, but applying it requires a functional USB recovery drive. If the device is bricked after the failed update, attempting a forced shutdown and repeated power cycles may allow access to the recovery environment. It’s crucial to download the latest firmware from the official Surface website and verify its checksum before installation. Users are advised to avoid automatic updates and manually install firmware updates to mitigate potential issues. Data backup before any firmware update is strongly recommended.

EZ66 Model C: SSD Compatibility Concerns

EZ66 Model C exhibits a higher sensitivity to SSD compatibility compared to other models, leading to frequent “No Bootable Device” errors. Specifically, certain NVMe SSDs from lesser-known manufacturers have demonstrated instability, particularly those utilizing older firmware revisions. The issue isn’t a complete failure to recognize the drive, but intermittent boot failures and data corruption. Users upgrading the SSD should consult the official Surface compatibility list before purchasing. If an incompatible SSD is suspected, attempting a BIOS/UEFI reset to default settings may temporarily resolve the issue. However, a full recovery using a bootable USB drive is often necessary. Regularly checking for SSD firmware updates is also crucial for maintaining system stability and preventing boot failures.

the vintage rolex field guide

The Vintage Rolex Field Guide: An Overview

This comprehensive guide delves into the captivating world of vintage Rolex, exploring iconic models like the Submariner and GMT-Master, a collector’s pursuit.

It offers insights into authenticity, condition assessment, and the crucial role of provenance, enhancing your collecting journey.

Discover the history of waterproof cases and the vibrant Rolex collecting community, including events like Rolliefest.

Understanding the Allure of Vintage Rolex

Vintage Rolex watches possess a unique magnetism, transcending mere timekeeping; they represent a legacy of precision, innovation, and enduring style. Their appeal stems from a rich history, meticulously crafted movements, and the stories embedded within each timepiece.

Collectors are drawn to the rarity and character of these watches, appreciating the patina developed over decades. The pursuit isn’t simply about ownership, but about connecting with a heritage of horological excellence. Each Rolex embodies a bygone era, offering a tangible link to the past, and a testament to timeless design.

This enduring quality, combined with increasing scarcity, fuels the passion of collectors worldwide, making vintage Rolex a captivating and rewarding field.

The Core Models: A Collector’s Focus

For vintage Rolex enthusiasts, certain models consistently command attention and investment. The Submariner, with its robust design and diving heritage, remains incredibly popular, alongside the GMT-Master, celebrated for its functionality and travel-oriented appeal.

The Daytona, a chronograph steeped in motorsport history, is also highly sought after. These core models represent the pinnacle of Rolex’s craftsmanship and design. Collectors often specialize in one reference, meticulously researching variations and seeking pristine examples.

Understanding these key models is fundamental to navigating the vintage Rolex market and appreciating their enduring value.

Key Vintage Rolex References

Explore iconic references like the Submariner (5512, 5513, 6538), GMT-Master (6542, 1675), and Daytona (6239, 6263, 6265) – cornerstones of collecting.

Rolex Submariner (References 5512, 5513, 6538)

The Rolex Submariner stands as perhaps the most recognizable and coveted vintage sports watch. References 5512, 5513, and 6538 represent pivotal moments in its evolution. The 6538, with its distinctive gilt dial and chapter ring, is particularly sought after by collectors.

Later models, like the 5512 and 5513, introduced variations in dial design and movement caliber. Understanding these nuances is crucial for authentication. A collector’s guide emphasizes the importance of originality, examining details like the crown, bezel insert, and bracelet. The classic Submariner remains a cornerstone of any serious vintage Rolex collection.

Rolex GMT-Master (References 6542, 1675)

The Rolex GMT-Master, designed for Pan Am pilots, quickly became an icon of adventure and functionality. Early references like the 6542, featuring a Bakelite bezel, are exceptionally rare and valuable. The subsequent 1675 introduced a more durable acrylic bezel insert, available in various color combinations.

A vintage GMT-Master guide highlights the importance of verifying dial originality and the condition of the rotating bezel. Collectors prize examples with well-preserved patina and complete sets of original components. The GMT-Master represents a compelling blend of history and horological excellence.

Rolex Daytona (References 6239, 6263, 6265)

The Rolex Daytona, synonymous with motorsports, is arguably the most coveted chronograph in the vintage market. References 6239, 6263, and 6265 showcase the evolution of this iconic timepiece, with variations in bezel types and dial configurations. Paul Newman’s association significantly boosted the Daytona’s desirability.

A vintage Daytona field guide emphasizes scrutinizing dial originality, case integrity, and bracelet authenticity. These watches command substantial premiums, making expert verification crucial. Collectors seek examples with a clear history and minimal restoration, appreciating the Daytona’s racing heritage.

Authenticity and Verification

Genuine components are paramount; redials and refinishing impact value. Serial and reference numbers are key identifiers, demanding careful scrutiny for a trustworthy vintage Rolex.

Identifying Genuine Components

Ensuring originality is crucial when verifying a vintage Rolex. Focus on details – the crown, hands, dial, and bezel must align with the reference period. Examine the Rolex logo; inconsistencies suggest tampering.

Inspect the movement, often a telltale sign of authenticity, seeking correct markings and caliber. Beware of replaced parts, as they diminish value. Originality extends to the bracelet and clasp, verifying codes and styles. A keen eye and research are essential for discerning genuine components from replacements.

Recognizing Redials and Refinishing

Redials – repainted dials – significantly impact a vintage Rolex’s value. Look for inconsistencies in font, printing quality, and lume application. Sharpness and alignment of text are key indicators; original dials exhibit subtle imperfections. Refinishing the case removes original factory markings, diminishing collectibility.

Examine lug holes for evidence of polishing, and check for softened edges. Over-polishing alters the case’s profile. A genuine, untouched dial and case command a premium, highlighting the importance of careful inspection.

The Importance of Serial and Reference Numbers

Serial and reference numbers are vital for verifying a vintage Rolex’s authenticity and history. The reference number identifies the model, while the serial number indicates the year of production. Cross-referencing these numbers with Rolex archives confirms originality.

Beware of altered or mismatched numbers, a red flag for fakes. Location is crucial – between the lugs, or engraved on the caseback (though less common). Documenting these numbers is essential for provenance and insurance purposes, safeguarding your investment.

Assessing Condition and Value

Evaluating a vintage Rolex requires scrutinizing case integrity, dial patina, and movement functionality. Originality significantly impacts value, alongside box and paper presence.

Case Condition: Lugs, Bezel, and Caseback

The case’s condition is paramount when assessing a vintage Rolex. Lugs should retain their original shape, exhibiting even wear without excessive polishing, which diminishes value. Bezel integrity is crucial; check for correct rotation, original markings, and absence of significant damage.

Caseback markings should be clear and consistent with the reference number. Look for signs of over-polishing, which can distort the case lines and reduce metal thickness. Sharpness of the case edges indicates less intervention, while rounded edges suggest frequent polishing. Dings and scratches are acceptable, reflecting age, but deep gouges detract from the overall condition and value.

Dial and Hands: Patina and Originality

Originality is key when evaluating a vintage Rolex dial and hands. Patina, the natural aging of the dial, is often desirable, indicating authenticity, but should appear even and consistent. Beware of repainted or refinished dials, as they significantly reduce value.

Hands should match the dial’s patina and be free from corrosion or damage. Check for correct hand styles for the specific reference. Lume plots should be intact and exhibit consistent aging. Any discrepancies – mismatched hands, uneven patina – raise red flags, suggesting potential non-original components.

Movement Examination: A Key Indicator

The movement is the heart of a vintage Rolex, and its condition is paramount. A qualified watchmaker’s assessment is crucial, verifying the caliber matches the reference and that all components are original. Look for signs of excessive wear, poor servicing, or replaced parts.

Serial numbers on the movement should correspond with the case. Cleanliness and proper lubrication indicate careful maintenance. A well-maintained movement suggests a history of responsible ownership, bolstering value and confirming authenticity. Movement examination is a definitive test.

The Rolex Oyster Bracelet

Rolex Oyster bracelets evolved significantly, with early variations differing from later designs. Bracelet codes reveal manufacturing dates, aiding in authentication and complementing your vintage Rolex research.

Early Bracelet Variations

Early Rolex Oyster bracelets showcased a fascinating evolution, differing considerably from modern iterations. Initially, bracelets featured riveted links, offering robust durability but requiring periodic maintenance. These early bracelets, often found on Submariners and GMT-Masters, utilized a unique clasp design.

Later variations transitioned to folded links, providing a more comfortable fit but potentially exhibiting stretch over time. Identifying these early bracelet types—like the riveted Oyster bracelet (Ref. 7206) or the early folded link bracelets—is crucial for collectors. Understanding these nuances contributes to accurate dating and assessing originality, enhancing the value of a vintage timepiece.

Bracelet Codes and Dating

Decoding bracelet codes is essential for establishing a vintage Rolex bracelet’s production period; These codes, stamped on the clasp or end links, provide valuable clues about the bracelet’s age and compatibility with specific watch references. Understanding these markings allows collectors to verify originality and assess the bracelet’s historical context.

Common codes include the year of manufacture and the bracelet’s specific design. Careful examination of these codes, combined with knowledge of Rolex’s bracelet evolution, helps determine if the bracelet is period-correct for the watch, significantly impacting its value.

Provenance and Documentation

Original boxes and papers dramatically increase a vintage Rolex’s value, confirming authenticity. Tracing ownership history adds another layer, enhancing collectibility.

Detailed records and previous owner information provide valuable context, strengthening the watch’s story;

The Value of Original Box and Papers

The presence of the original box and accompanying papers significantly elevates a vintage Rolex’s desirability and market value. These items serve as crucial corroborating evidence, bolstering the watch’s authenticity and confirming its lineage. A complete set demonstrates careful ownership and preservation, reassuring potential buyers.

Original boxes, often specific to the reference and period, offer a tangible connection to the watch’s history. Papers, including the original warranty certificate, provide documented proof of purchase and service records. Their absence doesn’t necessarily invalidate a watch, but it invariably impacts its price, often substantially.

Collectors actively seek complete sets, willing to pay a premium for the added assurance and historical context they provide. The condition of both the box and papers also plays a role, with well-preserved examples commanding higher prices.

Tracing Ownership History

Uncovering a vintage Rolex’s ownership history, or provenance, adds a compelling narrative and can significantly enhance its value. While often challenging, diligent research can reveal fascinating details about the watch’s past life and previous custodians. This detective work often involves contacting previous owners, researching auction records, and examining service documentation.

A well-documented ownership trail can authenticate a watch’s story, confirming its originality and potentially linking it to notable figures or events. This historical context appeals to collectors seeking more than just a timepiece; they desire a piece of history.

Establishing provenance requires patience and persistence, but the rewards – both in terms of knowledge and potential value – can be substantial. A compelling story elevates a vintage Rolex beyond a mere investment.

The History of Waterproof Rolex Cases

Rolex pioneered waterproof watch cases, beginning with early innovations in the 19th century and culminating in the revolutionary Oyster case, a design marvel.

Early Waterproofing Innovations

The quest for a waterproof watch began long before Rolex, tracing back to the era of pocket watches in the 19th century. Dennison, a British firm, secured a patent in 1872 for a waterproof case in the UK, marking an initial step. However, these early attempts often involved complex sealing mechanisms that proved unreliable in practical use.

Early innovations focused on creating tight seals around the case back and winding crown, but maintaining consistent waterproofing remained a significant challenge. These initial designs often lacked the robustness needed for everyday wear and were prone to failure with even minor impacts or exposure to moisture. Rolex would later revolutionize this field with a more integrated and durable approach.

The Oyster Case: A Revolutionary Design

Rolex’s Oyster case, introduced in 1926, represented a paradigm shift in watchmaking, addressing the limitations of earlier waterproofing attempts. This innovative design featured a screw-down case back and winding crown, creating a hermetically sealed environment protecting the movement from dust and water.

The Oyster case wasn’t merely about waterproofing; it was about creating a robust and reliable enclosure. Its construction minimized points of entry for contaminants, significantly enhancing the watch’s durability. This revolutionary design quickly became synonymous with Rolex, establishing the brand’s reputation for quality and innovation.

The Vintage Rolex Collecting Community

A passionate global network connects Rolex enthusiasts, fueled by events like Rolliefest. Collectors share knowledge, experiences, and a deep appreciation for these iconic timepieces, fostering a vibrant culture.

Key Events and Gatherings (Rolliefest)

Rolliefest stands as a premier, invitation-only biennial event for serious vintage Rolex collectors, founded in 2019 by Geoff Hess, a prominent figure at Sotheby’s. This exclusive gathering provides a unique platform for enthusiasts to connect, share their prized possessions, and deepen their understanding of these iconic watches.

Originally planned as a regular occurrence, the event faced a pause due to the global pandemic, but successfully resumed, reigniting the passion within the community. Rolliefest isn’t merely a display of watches; it’s a celebration of horological history, craftsmanship, and the enduring allure of Rolex. It’s a place where stories are exchanged, friendships are forged, and the collective knowledge of the vintage Rolex world is advanced.

Resources for Collectors

Navigating the vintage Rolex world requires access to reliable information and a supportive network. Numerous online forums and communities cater specifically to Rolex enthusiasts, offering platforms for discussion, identification assistance, and trade opportunities. Dedicated websites provide detailed reference guides, historical articles, and market analysis.

Auction houses like Sotheby’s and Christie’s frequently feature vintage Rolexes, offering both opportunities to acquire pieces and insights into current market values. Connecting with reputable dealers and watchmakers specializing in vintage Rolex is also crucial for authentication, restoration, and ongoing maintenance.

Investing in Vintage Rolex

Vintage Rolex watches represent a compelling investment, driven by market trends and iconic status. Understanding risks and rewards is vital for collectors, requiring careful research.

Price guides and expert analysis aid informed decisions, maximizing potential returns.

Market Trends and Price Guides

Navigating the vintage Rolex market demands awareness of current trends; four-digit references are now highly sought after, commanding significant premiums. Price fluctuations are influenced by rarity, condition, and historical significance, making diligent research essential.

Several reputable price guides, alongside auction results from houses like Sotheby’s, provide valuable benchmarks. However, these are merely indicators; expert appraisals offer tailored assessments. Market analysis reveals consistent demand for iconic models like the Submariner and GMT-Master, driving sustained value.

Staying informed about collector preferences and emerging trends is crucial for successful investment, ensuring optimal returns.

Risks and Rewards of Collecting

Vintage Rolex collecting presents both enticing rewards and inherent risks. Potential rewards include significant financial appreciation, the joy of ownership, and participation in a passionate community. However, counterfeiting and misrepresented watches pose substantial threats, demanding careful scrutiny.

Restoration and refinishing can impact value if not executed correctly. Market volatility also introduces risk; prices can fluctuate based on economic conditions and collector sentiment. Due diligence – authenticity verification and condition assessment – is paramount.

Informed collecting mitigates risks, maximizing the potential for long-term enjoyment and investment gains.

cataclysm alchemy leveling guide

Cataclysm Alchemy Leveling Guide: An Overview

Embark on a journey to master Cataclysm Alchemy! This guide details efficient 1-525 leveling, optimal material choices, and specialization paths for profit.

Discover the fastest routes, key recipes, and strategies to maximize your skill and earnings in this revamped classic profession.

Cataclysm Alchemy introduces a revitalized profession, brimming with new potions, flasks, and transmutations for Azeroth. This revamped system offers exciting opportunities for both casual players and dedicated gold-makers. The core of Cataclysm Alchemy revolves around efficiently leveling from 1 to 525, a process detailed within this guide.

Players will encounter a wealth of recipes, requiring strategic material gathering or shrewd Auction House purchases. Mastering the profession unlocks specializations – Potion, Elixir, and Transmutation – each offering unique benefits and profit potential. Prepare to delve into the magical science and unlock Alchemy’s full potential!

Why Choose Alchemy in Cataclysm Classic?

Alchemy in Cataclysm Classic presents a compelling profession choice due to its consistent demand and lucrative potential. Players consistently require potions and flasks for raiding, dungeons, and PvP, ensuring a steady market for crafted goods. Furthermore, Alchemy offers unique transmutation opportunities, allowing players to convert materials into valuable commodities for substantial gold gains.

Unlike some professions, Alchemy remains relevant throughout all stages of the game, providing consistent value. The ability to self-sufficiency with consumables also reduces reliance on external purchases, saving gold in the long run. It’s a rewarding path for those seeking both profit and utility!

Leveling Alchemy 1-525

Progress from novice to master! This section outlines the optimal leveling path, covering early potions, mid-range elixirs, and late-game transmutations to reach 525.

Early Leveling (1-75): Basic Potions & Recipes

Begin your alchemical journey with simple, readily available recipes. Focus on crafting Minor Healing Potions, Minor Mana Potions, and Swiftness Potions – these are inexpensive and provide consistent skill gains. Gathering common herbs like Peacebloom, Silverleaf, and Earthroot is crucial during this phase.

Prioritize volume over profit initially; the goal is rapid skill progression. Utilize Auction House purchases if gathering proves too time-consuming, but monitor prices carefully. Remember to complete any introductory alchemy quests for bonus experience and potential recipe unlocks. This initial stage establishes a foundation for more complex concoctions later on.

Mid-Leveling (75-225): Expanding Your Repertoire

As your skill grows, introduce more complex potions like Lesser Healing Potions, Lesser Mana Potions, and potions offering temporary stat boosts. This phase requires gathering herbs like Goldclover, Liferoot, and Gromsblood. Experiment with Volatile Mixtures when available, as they can significantly increase your skill-up rate.

Consider branching into elixirs, starting with Lesser Stamina Elixirs and Lesser Intellect Elixirs. Monitor Auction House prices for profitable opportunities, and begin to specialize your material gathering. Focus on recipes that offer a good balance between cost and skill gain, optimizing for efficiency.

Late-Leveling (225-375): Focusing on Efficiency

This stage demands a focus on maximizing skill gains per material spent. Prioritize recipes utilizing readily available and affordable herbs like Whiperweed, Frost Lotus, and Icethorn. Transmutations become increasingly valuable for skill-ups, particularly those with lower reagent costs.

Begin to specialize towards your chosen Alchemy path – Potion Mastery, Elixir Mastery, or Transmutation Mastery – as quests become available at skill 475. Efficiently manage your Volatile Mixtures and carefully analyze Auction House trends to identify profitable crafting opportunities.

Reaching 375-525: The Final Push

The final stretch requires dedication and strategic crafting. Focus almost exclusively on recipes that grant multiple skill points per craft, even if material costs are slightly higher. Utilize daily quests and reputation rewards that offer Alchemy-related recipes or materials.

Flasks and high-end potions become crucial for efficient leveling. Continuously monitor Auction House prices to ensure profitability while leveling. Mastering your chosen specialization will unlock further benefits and recipes, accelerating your progress to 525.

Cataclysm Alchemy Specializations

Choose wisely! Potion Mastery, Elixir Mastery, or Transmutation Mastery offer unique benefits. Specializations unlock at 475 skill, enhancing crafting efficiency and profits.

Potion Mastery: A Deep Dive

Potion Mastery focuses on enhancing potion effects and reducing their cooldowns, making you a vital asset in raids and PvP. This specialization is easily acquired through a questline, offering immediate benefits. Mastering potions allows for crafting powerful healing and utility options, consistently in high demand on the Auction House.

Switching to other specializations requires a gold cost, making Potion Mastery a solid initial choice. It provides a stable income stream while you explore other crafting avenues. Expect to create flasks, health potions, and mana potions frequently, catering to a broad player base seeking consumables.

Elixir Mastery: Benefits and Recipes

Elixir Mastery centers around creating powerful elixirs that grant temporary stat boosts, crucial for challenging content. This specialization enhances elixir potency and reduces reagent costs, maximizing profitability. Key recipes include Elixir of the Mongoose, Elixir of Greater Firepower, and various stat-boosting draughts.

While potentially lucrative, elixir demand can be more volatile than potions. Success relies on understanding raid compositions and PvP meta. Mastering elixir crafting requires careful market analysis and efficient material sourcing to maintain a competitive edge and consistent sales.

Transmutation Mastery: Optimizing for Profit

Transmutation Mastery focuses on converting cheaper materials into more valuable ones, offering substantial profit margins. Key transmutations include transforming ores into gems and creating Primal Might/Life. This specialization reduces transmutation costs and increases yield, boosting overall earnings.

However, transmutation profitability is heavily reliant on Auction House prices and material availability. Constant monitoring and quick adaptation to market fluctuations are essential. Successful transmutation requires a keen understanding of supply and demand, alongside efficient material gathering or purchasing strategies.

Essential Materials for Cataclysm Alchemy

Gathering herbs or utilizing the Auction House are key choices. Core herbs include Twilight Jasmine, Goldclover, and Frost Lotus, alongside Volatile mixtures for crafting.

Gathering vs. Auction House: A Cost Analysis

Deciding between gathering your own materials and purchasing them from the Auction House is crucial for efficient leveling. Gathering offers long-term savings, but requires significant time investment and knowledge of herb locations.

Auction House purchases provide immediate access to needed ingredients, bypassing travel time and farming efforts, but can be considerably more expensive, especially during peak demand.

Consider your server’s economy; volatile prices fluctuate. Early levels favor gathering due to lower herb costs, while later stages might benefit from Auction House convenience, depending on market conditions.

Ultimately, a hybrid approach – gathering common herbs and buying rarer ones – often strikes the best balance between cost and efficiency.

Key Herbs for Leveling

Throughout your Cataclysm Alchemy journey, certain herbs become invaluable. Early leveling (1-75) relies heavily on Peacebloom, Silverleaf, and Earthroot, readily available in starting zones.

As you progress (75-225), focus on gathering Grave Moss, Kingsblood, and Lichbloom, found in more challenging areas. Later stages (225-375) demand Twilight Jasmine, Frost Lotus, and Icethorn, often requiring travel to specific zones.

Golden Lotus, though expensive, is essential for high-level recipes. Prioritize efficient farming routes and consider utilizing tracking abilities to maximize herb acquisition.

Stockpiling these key herbs ensures smooth progression and minimizes Auction House dependency.

Utilizing Volatile Mixtures

Volatile mixtures are a cornerstone of Cataclysm Alchemy leveling, offering efficient skill gains and often cheaper alternatives to direct recipe crafting. These unstable compounds require specific primary herbs and a Volatile element – Earth, Fire, Water, or Air.

Experimenting with different volatile combinations unlocks numerous recipes, providing diverse leveling options. Focus on acquiring the necessary volatile reagents through quests, daily tasks, or the Auction House.

Mastering volatile mixtures reduces reliance on expensive, single-herb recipes, accelerating your progress towards 525 skill. They are particularly useful during mid-leveling phases.

Remember to check current market prices to determine the most cost-effective volatile strategy.

Maximizing Profit with Cataclysm Alchemy

Unlock substantial gold through flasks, potions, and transmutations! Daily quests and reputation rewards further boost income, making Alchemy a lucrative profession.

Flasks and Potions: High-Demand Items

Flasks and potions consistently represent the most profitable avenues within Cataclysm Alchemy, driven by raiders and PvPers alike. Demand surges during raid progression and arena seasons, creating consistent market opportunities. Focus on crafting Flasks of the Stoneblood and Flasks of Endless Rage, as these are perpetually sought after.

Potions like Potion of Speed and Potion of Stoneform also maintain steady sales. Mastering efficient crafting and sourcing materials affordably is crucial. Regularly monitor Auction House prices to identify optimal selling times and maximize your returns. Consider specializing in Potion Mastery to enhance yields and reduce material costs, further bolstering profitability.

Transmutations for Gold Making

Transmutations offer substantial gold-making potential, though market fluctuations require diligent monitoring. Transmuting Primal Might into Eternal Life and Primal Wisdom into Eternal Fire consistently yields profit, contingent on herb prices. Regularly check Auction House trends to capitalize on price differences between source materials and finished products.

Investing in Transmutation Mastery significantly reduces cooldowns, enabling higher throughput and increased earnings. Experiment with less common transmutations, identifying niche markets with limited competition. Efficient material acquisition and astute pricing strategies are paramount for maximizing profitability in the transmutation arena.

Daily Quests and Reputation Rewards

Daily quests offered by Alchemy trainers provide consistent gold and valuable reputation with associated factions. These quests often require crafting specific potions or elixirs, accelerating skill progression alongside financial gain. Prioritize completing these dailies, as reputation unlocks exclusive recipes and discounts on essential materials.

Reputation rewards frequently include potent transmutes or unique potion formulas unavailable elsewhere. Building rapport with relevant factions enhances access to profitable crafting opportunities. Consistent participation in daily quests and reputation farming represents a sustainable income stream for dedicated alchemists.

Alchemy Leveling Locations

Orgrimmar and Stormwind serve as central hubs, offering convenient access to trainers and auction houses. Specific zones provide abundant herb gathering opportunities for efficient leveling.

Orgrimmar & Stormwind: Central Hubs

Both Orgrimmar and Stormwind function as crucial central hubs for Cataclysm Alchemy leveling, providing immediate access to essential profession trainers. These cities streamline the learning of new recipes and facilitate quick skill upgrades. Furthermore, their bustling auction houses are invaluable for both acquiring necessary materials and selling crafted goods.

The proximity to vendors offering daily cooldown reduction items, like Volatile Mixtures, is another significant advantage. Regularly utilizing these items dramatically speeds up the leveling process. Conveniently located flight paths also enable swift travel to various herb-rich zones, optimizing gathering efficiency and minimizing downtime.

Specific Zone Recommendations

Mount Hyjal offers a fantastic starting point, boasting plentiful herbs like Whippersnap and Goldclover, ideal for early-level potions. Deepholm becomes increasingly valuable as you progress, providing access to herbs like Lichbloom and Frost Lotus, crucial for mid-range recipes.

Uldum is excellent for gathering herbs needed for higher-level transmutations and potions, while Twilight Highlands provides a steady supply of herbs required for end-game flasks and elixirs. Remember to check auction house prices before committing to extensive gathering, optimizing for profit.

Advanced Alchemy Techniques

Master critical yield for increased potion output and leverage Alchemy Stone bonuses to enhance your crafting efficiency and maximize potential profits.

Understanding Critical Yield

Critical yield in Cataclysm Alchemy represents the chance to create two potions or elixirs instead of the standard one during crafting. This mechanic significantly boosts your output and profitability, especially when dealing with expensive or time-consuming recipes.

Several factors influence your critical yield chance, including your Alchemy skill level, the specific recipe being used, and any applicable bonuses from gear or consumables. Increasing your skill and utilizing items that enhance critical strike chance are crucial for maximizing this benefit.

Understanding and optimizing critical yield is a cornerstone of advanced Alchemy, allowing you to generate more products from the same materials, ultimately leading to greater gold-making potential.

Alchemy Stone Bonuses

Alchemy stones offer a valuable, often overlooked, boost to your profession. These socketable gems provide various benefits, most notably increasing your critical yield chance when crafting potions and elixirs. Selecting the correct stone can dramatically improve your output and profitability.

Different stones offer varying levels of bonus, so researching the best options for your current skill level and crafting goals is essential. Consider stones that also provide secondary stats beneficial to your character, maximizing their overall value.

Investing in a quality Alchemy stone is a relatively inexpensive way to significantly enhance your crafting efficiency.

Troubleshooting Common Issues

Encountering recipe acquisition problems or material shortages? This section provides solutions for common Cataclysm Alchemy leveling roadblocks, ensuring a smoother progression.

Recipe Acquisition Problems

Struggling to find specific Cataclysm Alchemy recipes? Many are learned from trainers, requiring reaching certain skill levels and completing associated quests. Others drop from creatures or are purchased from vendors, often with limited stock.

Check auction houses frequently, as players often resell recipes. Utilize online databases like Wowhead to pinpoint drop locations and vendor availability. Remember that some recipes are reputation-locked, demanding faction standing. Don’t hesitate to explore profession-specific daily quests, as they occasionally reward rare recipes, accelerating your leveling journey.

Material Shortages

Facing scarcity with essential Cataclysm Alchemy ingredients? Popular herbs like Twilight Jasmine and Frost Lotus can experience price spikes due to high demand. Consider diversifying your sourcing – combine gathering with Auction House purchases.

Explore alternative herbs with similar properties, and monitor auction house trends for optimal buying times. Utilizing Volatile Mixtures efficiently can reduce reliance on specific materials. Farming zones strategically and establishing alt characters dedicated to herbalism can mitigate shortages, ensuring a smoother leveling experience.

Resources and Tools

Leverage websites and databases for recipes and pricing. Utilize addons to streamline ingredient tracking, manage costs, and optimize your Cataclysm Alchemy workflow.

Useful Websites and Databases

Navigating the world of Cataclysm Alchemy requires access to comprehensive data. Websites like Wowhead and Allakhazam offer extensive databases detailing every recipe, ingredient, and associated quest. These platforms are invaluable for confirming recipe acquisition, checking current material costs, and understanding potential profit margins.

Auction House data tracking sites, such as The Undermine Journal, provide real-time pricing information for potions, flasks, and transmutations, enabling informed decisions about what to craft and sell. Regularly consulting these resources will significantly enhance your efficiency and profitability as you level your Alchemy skill.

Addons for Alchemy Management

Streamlining your Cataclysm Alchemy leveling experience is achievable with helpful addons. TradeSkillMaster (TSM) is a powerful tool for managing materials, tracking auction house prices, and automating crafting operations. It allows for efficient profit calculations and minimizes wasted time.

Alchemy specific addons, like PotionLab, can assist with recipe tracking and ingredient management. These addons provide quick access to crucial information, reducing the need to constantly consult external websites. Utilizing these tools will optimize your workflow and maximize your gold-making potential throughout the leveling process.

Suitability for Alts

Alchemy is excellent for alts, providing self-sufficiency and gold generation. Leveling on multiple characters boosts material access and crafting opportunities for profit.

Leveling Alchemy on Multiple Characters

Duplicating Alchemy across alts significantly accelerates progress and wealth accumulation. Each character contributes to gathering diverse herbs, reducing Auction House dependency. This approach unlocks multiple crafting slots, boosting potion, flask, and transmutation output.

Consider focusing different specializations on each alt – Potion Mastery on one, Elixir Mastery on another, and Transmutation on a third – to maximize crafting versatility. Cross-realm characters can pool resources, but logistical coordination is essential. This strategy is particularly effective for players aiming to dominate the market with a wide range of alchemical products.

Cross-Realm Considerations

Cross-realm Alchemy leveling presents unique challenges and opportunities. While accessing wider herb markets is beneficial, transferring materials between realms incurs significant costs. Auction House prices fluctuate wildly across servers, demanding careful market analysis.

Guild coordination becomes crucial for resource sharing and recipe acquisition. Consider establishing a network of alchemists across multiple realms to streamline material procurement. Be mindful of realm-specific economies and adjust crafting strategies accordingly. Efficient cross-realm play requires diligent planning and a strong understanding of server dynamics.

local tv guide des moines iowa

Local TV Guide Des Moines Iowa: A Comprehensive Plan

Des Moines, Iowa, offers diverse television viewing options, encompassing over-the-air signals, cable (Mediacom), satellite (Dish & DIRECTV), and streaming services like fubo, Hulu + Live TV, and YouTube TV.

Des Moines, Iowa, enjoys a robust television market serving a diverse population across the metropolitan area and extending into surrounding communities like Ames. Accessing local programming and national networks is readily available through a variety of methods, catering to different preferences and budgets. Viewers can choose from traditional over-the-air broadcasts utilizing digital antennas, comprehensive cable packages offered by providers like Mediacom, satellite television services from Dish Network and DIRECTV, or increasingly popular streaming alternatives.

This guide aims to provide a complete overview of the television landscape in Des Moines, detailing channel lineups, programming options, and resources for finding what to watch. Understanding the available providers, signal types (HD, SD, 4K), and troubleshooting common reception issues will empower viewers to optimize their television experience. The rise of streaming services has further expanded choices, offering flexible plans and on-demand content. Navigating these options effectively requires a reliable and up-to-date local TV guide.

As of today, December 16th, 2025, at 8:57:06 PM (Central Time), television schedules in Des Moines, Iowa, are subject to change. Program listings are dynamic and can be altered by networks and providers with little notice. This timestamp serves as a reference point for the accuracy of information presented within this guide. It’s crucial to verify showtimes and channel availability directly with your television provider or through online program guides like Zap2it or TVGuide.com.

Real-time updates are essential, especially for live events like sports broadcasts and breaking news coverage. The N.C; Division of Employment Security (though unrelated to TV) highlights the importance of secure, up-to-date information, mirroring the need for current TV listings. Utilizing reliable sources ensures you don’t miss your favorite programs or important local news. Remember to rescan your channels periodically for the most accurate lineup.

Overview of TV Broadcasting in Des Moines

Des Moines, Iowa, benefits from a robust television broadcasting landscape, offering viewers a wide array of choices. The market is served by major network affiliates, alongside numerous local channels delivering community-focused programming. Historically, television access relied heavily on over-the-air signals and cable providers like Mediacom. However, the rise of satellite television – Dish Network and DIRECTV – expanded options, particularly for rural areas.

More recently, streaming services such as fubo, Hulu + Live TV, and YouTube TV have become increasingly popular alternatives, providing on-demand content and live channels. The digital TV transition has improved signal quality, with many broadcasts now available in HD and even 4K. Understanding signal types and troubleshooting potential reception issues are key to maximizing your viewing experience. The N.C. Division of Employment Security’s emphasis on secure access parallels the need for reliable TV signals.

Available TV Providers in Des Moines

Des Moines residents have several options for television service. Mediacom is the primary cable provider, offering a range of channel packages and pricing tiers to suit different budgets and viewing preferences. Satellite television is readily available through Dish Network and DIRECTV, providing extensive channel lineups and nationwide coverage, though installation considerations apply.

Increasingly, cord-cutting is popular, with streaming services becoming viable alternatives. fubo specifically targets sports enthusiasts in the Des Moines/Ames area, while Hulu + Live TV and YouTube TV offer broader channel selections. These streaming platforms often require a reliable internet connection. Like the N.C. Division of Employment Security’s secure access protocols, choosing a provider involves considering security and reliability. Comparing packages, pricing, and features is crucial for finding the best fit.

Major Network Affiliates & Channel Lineups

Des Moines is served by major network affiliates, ensuring access to popular national programming. CBS is typically found on KCCI, while WHO-TV broadcasts NBC content. FOX programming is available through KDSM, and CW programming can be found on KCWI. These affiliates provide local news, weather, and sports alongside network shows.

Channel lineups vary significantly depending on the provider. Mediacom offers tiered packages, with basic plans including local channels and a limited selection of cable networks. Higher tiers add sports, movie channels, and premium content. Satellite providers like Dish Network and DIRECTV boast extensive channel lists, often exceeding cable offerings. Streaming services like fubo, Hulu, and YouTube TV curate channel packages, mirroring traditional cable but delivered over the internet, similar to the N.C. Division of Employment Security’s online access.

Local Channels & Programming

Des Moines’ local channels offer a blend of news, community programming, and locally produced content. KCCI, WHO-TV, KDSM, and KCWI dedicate significant airtime to regional news coverage, weather forecasts, and investigative reporting, keeping residents informed about local events. Beyond news, these stations often feature community calendars, public service announcements, and high school sports broadcasts.

Public access channels provide a platform for local voices and organizations. These channels showcase community events, government meetings, and independent productions. Additionally, several Spanish-language channels cater to the growing Hispanic population in the Des Moines area. Like the N.C. Division of Employment Security’s focus on local workforce needs, these channels prioritize local relevance and engagement, offering a unique perspective beyond national broadcasts.

Over-the-Air TV Listings

Accessing television via an antenna in Des Moines provides free access to major network affiliates and select local channels. Viewers can receive signals for KCCI (CBS), WHO-TV (NBC), KDSM (Fox), and KCWI (ABC), alongside other digital subchannels. Signal strength varies depending on location and antenna quality; urban areas generally experience better reception than rural locations.

To discover current over-the-air listings, resources like Zap2it and TVGuide.com offer comprehensive schedules. Regularly scanning for available channels is crucial, as frequencies and programming can change. Similar to the N.C. Division of Employment Security’s need for updated information, staying current with channel lineups ensures optimal viewing. Digital antennas are recommended for improved picture quality and access to HD broadcasts, offering a cost-effective alternative to cable or satellite.

Digital Antenna Reception in Des Moines

Successful digital antenna reception in Des Moines hinges on several factors, including antenna type, placement, and distance from broadcast towers. Indoor antennas are suitable for closer proximity to transmitters, while outdoor antennas offer superior range and signal stability. Terrain and obstructions like buildings and trees can impact signal quality, necessitating strategic antenna positioning.

The digital TV transition has resulted in clearer picture and sound, but also requires a digital-compatible antenna. Similar to the N.C. Division of Employment Security’s security measures, ensuring the right equipment is vital. Channel scanning is essential to identify available broadcasts, and periodic rescaning is recommended. Understanding signal types – HD, SD, and 4K – helps optimize viewing experience. Resources like TVGuide.com can assist in identifying broadcast frequencies and channel lineups for Des Moines.

Channel Scanning & Program Guides

After connecting a digital antenna, initiating a channel scan on your TV is crucial; This process automatically detects available over-the-air broadcasts in the Des Moines area. Regular rescanning is advisable, as channel frequencies can change. Program guides, both on-screen and online, are essential for navigating available content.

Websites like Zap2it and TVGuide.com provide detailed TV Listings for Des Moines, IA, including schedules for local channels, cable, and satellite providers. These guides often allow filtering by channel, genre, and time. Similar to the N.C. Division of Employment Security’s one-time passcode verification, utilizing these tools ensures access to accurate and up-to-date programming information. Remember to check for updates, as schedules are subject to change, offering a comprehensive viewing experience.

Cable TV Listings ─ Mediacom

Mediacom is a primary cable provider serving Des Moines, Iowa, offering a wide array of channels and packages. Accessing Mediacom’s channel lineup is typically done through their on-screen program guide, accessible directly on your television. This guide provides current and upcoming programming schedules. For more detailed listings, Mediacom customers can also utilize their website or mobile app.

Similar to the security measures employed by the N.C. Division of Employment Security, Mediacom requires account login for full access to personalized features. Listings often include program descriptions, ratings, and parental control options. Exploring Mediacom’s on-demand services expands viewing choices beyond scheduled broadcasts, mirroring the convenience of modern streaming platforms; Regularly checking the guide ensures you don’t miss your favorite shows.

Mediacom Channel Packages & Pricing

Mediacom in Des Moines, Iowa, structures its cable television offerings into tiered packages, catering to diverse viewing preferences and budgets. Basic packages typically include local channels and popular networks, while higher tiers add premium channels like HBO and Showtime, alongside expanded sports and news coverage. Pricing varies significantly based on the selected package and any promotional offers.

Customers should consult Mediacom’s official website or contact their customer service for the most up-to-date pricing information. Similar to the N.C. Division of Employment Security’s secure account access, Mediacom often requires account login to view personalized pricing and available bundles. Bundling television service with internet and phone can often result in cost savings. Be sure to inquire about installation fees and equipment rental charges when comparing packages.

On-Demand & Interactive Features

Mediacom in Des Moines, Iowa, enhances the television experience with a robust suite of on-demand and interactive features. Viewers can access a vast library of movies and TV shows through Mediacom’s on-demand service, allowing for convenient viewing at any time. Similar to the secure access required by the N.C. Division of Employment Security, accessing certain on-demand content may require account authentication.

Interactive program guides (IPGs) provide enhanced channel listings, program information, and the ability to set reminders. Some packages may include access to interactive games and applications. Furthermore, Mediacom offers features like pay-per-view events and the ability to record programs with a digital video recorder (DVR). These features aim to provide viewers with greater control and flexibility over their television viewing experience.

Satellite TV Listings ─ Dish Network & DIRECTV

Dish Network and DIRECTV are prominent satellite television providers serving Des Moines, Iowa, offering extensive channel lineups and nationwide coverage. Like navigating the N.C. Division of Employment Security website, users require secure account access to manage their subscriptions and view detailed program guides. Both providers deliver hundreds of channels, including local Des Moines affiliates, national networks, and specialized programming.

DIRECTV is known for its exclusive content and advanced DVR capabilities, while Dish Network often provides competitive pricing and innovative features. Installation typically requires a professional technician to ensure optimal signal reception, considering potential obstructions. Both services offer high-definition (HD) and 4K viewing options, enhancing the visual experience. Programming packages cater to diverse interests, including sports, movies, and family entertainment.

Satellite Dish Installation & Considerations

Successful satellite television reception in Des Moines, Iowa, hinges on proper dish installation. Similar to the secure access needed for the N.C. Division of Employment Security, a clear line of sight to the satellite is crucial, free from obstructions like trees or buildings. Professional installation, offered by both Dish Network and DIRECTV, is highly recommended to guarantee optimal signal strength and reliability.

Considerations include the dish’s placement – typically on the roof or a sturdy mount – and precise aiming towards the designated satellite. Weather conditions, particularly heavy snow or storms, can temporarily disrupt signals. Homeowners should also be aware of potential homeowner association restrictions regarding dish placement. Ensuring a secure and weatherproof installation prevents signal loss and extends the lifespan of the equipment, maximizing viewing enjoyment of local and national programming.

Programming Packages & Sports Options

Des Moines viewers have a wide array of programming packages available through Dish Network and DIRECTV. Packages typically range from basic local channels to comprehensive bundles including premium movie channels and extensive sports networks. For sports enthusiasts, both providers offer specialized packages catering to various interests, from professional leagues like the NFL and NBA to college sports and regional sports networks.

fubo, a streaming alternative, particularly emphasizes sports programming, making it a strong contender for dedicated fans. Hulu + Live TV and YouTube TV also offer sports channels within their broader lineups. Package pricing varies significantly based on channel selection and included features. Careful consideration of viewing habits and preferred sports is essential when choosing a package to ensure optimal value and entertainment, mirroring the secure access needed for services like the N.C. Division of Employment Security.

Streaming Services as Alternatives

Des Moines residents increasingly turn to streaming services as viable alternatives to traditional cable and satellite TV. fubo stands out with its focus on sports, particularly appealing to fans in the Des Moines/Ames area. Hulu + Live TV and YouTube TV provide broader channel lineups, including local channels and popular cable networks, offering a comprehensive viewing experience.

Sling TV presents a more budget-friendly option with customizable packages. These services generally require a reliable internet connection and offer features like on-demand content and cloud DVR. Streaming eliminates the need for lengthy contracts and expensive equipment, providing flexibility and control. Like accessing secure services such as the N.C. Division of Employment Security, these platforms often employ multi-factor authentication for account protection.

fubo ⎻ Des Moines/Ames Area, IA

fubo is a prominent streaming service specifically catering to sports enthusiasts in the Des Moines/Ames, Iowa, region. It delivers access to a wide array of channels featuring live sports events, including regional networks crucial for following local teams. Beyond sports, fubo also offers news, entertainment, and family-friendly programming, making it a versatile option.

Subscribers benefit from features like cloud DVR storage and simultaneous streams, accommodating multiple viewers. The service’s interface is designed for easy navigation, similar to the secure login process required for accessing resources like the N.C. Division of Employment Security, often utilizing one-time passcodes. fubo provides a cable-free alternative, eliminating long-term contracts and installation fees, appealing to cord-cutters seeking a dynamic viewing experience.

Hulu + Live TV, YouTube TV, Sling TV Options

For Des Moines viewers seeking alternatives to traditional cable, Hulu + Live TV, YouTube TV, and Sling TV present compelling options. These streaming services bundle live television channels with on-demand content, offering a comprehensive entertainment package. Each platform features distinct channel lineups and pricing tiers, catering to diverse preferences and budgets.

YouTube TV is known for its unlimited cloud DVR storage, while Sling TV provides customizable packages, allowing users to select channels à la carte. Hulu + Live TV integrates seamlessly with Hulu’s extensive streaming library. Like accessing secure accounts, such as the N.C. Division of Employment Security, these services require account logins and often employ multi-factor authentication for enhanced security. These platforms offer a flexible, contract-free approach to television viewing in the Des Moines area.

Specific Program Guides & Websites

Des Moines television viewers have several resources for accessing detailed program listings. Zap2it and TVGuide.com remain popular choices, offering comprehensive schedules for local channels, cable, and satellite providers. These websites allow users to search by channel, time, or program title, facilitating easy planning of their viewing experience.

Beyond these established platforms, many TV providers – like Mediacom – offer interactive program guides directly through their set-top boxes and online portals. These guides often include features like program descriptions, parental controls, and the ability to set reminders. Similar to accessing secure information, like with the N.C. Division of Employment Security, some features may require account login. Utilizing these resources ensures viewers stay informed about the latest programming available in the Des Moines/Ames area.

Zap2it & TVGuide.com for Des Moines Listings

Zap2it and TVGuide.com serve as valuable online resources for Des Moines, Iowa, television schedules. Both platforms provide extensive listings covering broadcast, cable, and satellite channels available in the area. Users can easily navigate these websites to find program information, including show descriptions, air times, and channel numbers.

A key feature of both sites is the ability to customize listings based on your specific TV provider, ensuring accuracy. Like securing an account with the N.C. Division of Employment Security, users may need to input their zip code and provider to refine results. These websites also often include features like movie listings and sports schedules, making them a one-stop shop for entertainment planning. They are readily accessible and offer a convenient way to stay up-to-date with what’s on TV in Des Moines.

Local News & Weather Channels

Des Moines viewers have several options for staying informed about local news and weather. Major network affiliates – KCCI (CBS), WHO (NBC), KDCA (CW), and KDSM (Fox) – all maintain robust local news departments with frequent broadcasts throughout the day. These channels provide coverage of regional events, politics, and community happenings.

Dedicated weather coverage is also prominent, particularly important given Iowa’s variable climate. Many stations offer extended weather forecasts and severe weather alerts. Beyond the major networks, local access channels and some cable packages may feature hyperlocal news and community programming. Accessing this information is as straightforward as tuning into the appropriate channel, much like verifying identity with the N.C. Division of Employment Security through a one-time passcode.

Understanding TV Signal Types (HD, SD, 4K)

Des Moines television broadcasts utilize varying signal types, impacting picture quality. Standard Definition (SD) is the oldest format, offering the lowest resolution. High Definition (HD) provides a significantly sharper image with more detail, becoming the standard for most programming. Increasingly, 4K Ultra HD is emerging, delivering four times the resolution of HD for an exceptionally clear and immersive viewing experience.

The availability of these formats depends on the channel and provider. Over-the-air signals, cable, and satellite services all offer a mix. Streaming services often prioritize HD and 4K. Understanding these distinctions is crucial for optimizing your viewing experience, similar to verifying your identity with Multi-Factor Authentication. Signal strength and antenna quality also influence picture clarity, especially for over-the-air broadcasts.

Digital TV Transition & Current Standards

Des Moines transitioned to digital television broadcasting in 2009, eliminating analog signals. This shift dramatically improved picture and sound quality, and freed up bandwidth for public safety communications. Current standards primarily revolve around ATSC 3.0, the latest over-the-air broadcast standard, offering enhanced features like improved reception and interactive capabilities. However, adoption of ATSC 3.0 is still evolving across the Iowa market.

Cable and satellite providers utilize digital compression technologies to deliver a wider range of channels. Streaming services rely on internet protocols for transmission. Understanding these standards is vital for troubleshooting signal issues and maximizing your TV experience. Like the security measures employed by the N.C. Division of Employment Security, these standards ensure reliable and secure delivery of television programming to Des Moines viewers.

Troubleshooting TV Signal Issues

Des Moines viewers occasionally encounter TV signal problems. Common causes include antenna positioning (for over-the-air), weather interference, and cable/satellite dish misalignment. First, check all cable connections and ensure your antenna is properly aimed. Rescanning channels can resolve temporary signal disruptions, similar to the one-time passcode verification used by the N.C. Division of Employment Security.

For cable or satellite, contact your provider – Mediacom, Dish, or DIRECTV – for assistance. Streaming services require a stable internet connection; test your speed. If issues persist, consider a signal amplifier for over-the-air reception. Remember that factors like building materials and distance from broadcast towers can affect signal strength. Regularly checking your equipment and understanding potential causes will help maintain a clear picture.

Arabic Letter Seen (س) ⎻ A Tangential Note

While seemingly unrelated to Des Moines television, the Arabic letter Seen (س) offers an interesting linguistic detour. Representing the ‘S’ sound, as in “sun,” it’s the twelfth letter of the Arabic alphabet. Its wave-like shape distinguishes it, and it’s categorized as a “sun letter” – pronunciation changes when it follows the definite article “al.”

This connection is purely illustrative, mirroring the diverse information sources one might encounter while researching even a localized topic like TV guides. Just as understanding the nuances of a different language requires exploration, navigating Des Moines’ TV options – from Mediacom to fubo – demands a comprehensive approach. The letter Seen, therefore, serves as a reminder that knowledge often comes from unexpected places, much like finding the perfect channel listing.

Pronunciation & Significance of the Letter Seen

The Arabic letter Seen (س) is pronounced with a distinct hissing sound, easily recognizable in spoken Arabic. Its significance extends beyond simple phonetics; as a “sun letter,” its articulation alters the pronunciation of the following consonant when attached to the definite article “al” (ال). This linguistic feature, while seemingly abstract, highlights the intricate structure of the Arabic language.

Relating this back to Des Moines TV guides, consider the precision needed to locate specific programming. Just as accurate pronunciation is vital in Arabic, accurate channel numbers and times are crucial for enjoying your favorite shows. Whether browsing Mediacom listings, checking fubo’s sports options, or using TVGuide.com, clarity and precision are key. The Seen letter’s distinctiveness mirrors the need for clear information when navigating the world of television.

Relevance (or lack thereof) to Des Moines TV Guide

The inclusion of the Arabic letter Seen (س) within a Des Moines, Iowa, TV guide discussion appears, admittedly, tangential. Its primary connection lies in illustrating a point about unexpected information and the comprehensive nature of a truly exhaustive guide. A complete resource might, theoretically, contain any piece of knowledge, however unrelated to television broadcasting.

However, stretching for relevance, one could argue that just as the Seen letter represents a specific sound within a complex linguistic system, each channel and program represents a unique signal within the vast spectrum of available television. Navigating Mediacom, Dish, or streaming services like fubo requires decoding a similar “signal” of information. Ultimately, the letter’s inclusion serves as a playful reminder that even the most focused guides can acknowledge the broader world of knowledge.

sliding shower door guides bottom

Sliding shower door bottom guides are essential components‚ ensuring smooth and reliable operation of your shower enclosure. These guides‚ often plastic or metal‚
keep the door aligned within the track‚ preventing wobbling and sticking. Maintaining these guides extends the lifespan of your shower door and improves water containment.

What are Sliding Shower Door Bottom Guides?

Sliding shower door bottom guides are crucial parts found on top-hung shower door systems‚ facilitating smooth movement along the track. Typically constructed from plastic or metal‚ these guides attach to the bottom of the glass door panel.

They fit within a 1/2 inch channel‚ supporting the door’s weight and maintaining alignment. Shuisen and Prime-Line are popular brands offering these guides‚ designed for glass thicknesses up to 7/16 inch. Their primary function is to prevent the door from derailing or wobbling during use‚ ensuring a secure and watertight seal.

Why Bottom Guides Matter for Smooth Operation

Sliding shower door bottom guides are vital for effortless door movement‚ preventing frustrating sticking or wobbling. Worn or broken guides compromise the door’s alignment‚ leading to operational difficulties and potential water leakage.

Properly functioning guides distribute the door’s weight evenly‚ reducing stress on rollers and the track. Regular maintenance‚ including cleaning and lubrication‚ ensures continued smooth gliding. Addressing guide issues promptly‚ as suggested by ACE DECOR‚ prevents further damage and extends the shower door’s lifespan‚ maintaining a secure enclosure.

Types of Sliding Shower Door Bottom Guides

Sliding shower door bottom guides come in plastic‚ metal‚ and adjustable varieties. Plastic guides are common‚ while metal offers durability. Adjustable guides allow for fine-tuning alignment;

Plastic Bottom Guides

Plastic bottom guides‚ like the Prime-Line M 6192‚ are a frequently used and cost-effective solution for sliding shower doors. They are designed to fit within 1/2 inch channels and accommodate glass thicknesses up to 7/16 inch.

These guides are generally quieter in operation compared to metal alternatives‚ reducing noise during sliding. While durable enough for many applications‚ plastic guides may be more susceptible to wear and tear over time‚ especially with frequent use or heavier doors. They are easily installed with a simple two-fastener system.

Metal Bottom Guides

Metal bottom guides offer increased durability and strength compared to plastic options‚ making them suitable for heavier shower doors or high-traffic bathrooms. While less common than plastic‚ metal guides provide a robust solution for long-lasting performance.

They maintain alignment within the 1/2 inch channel and support glass thicknesses up to 7/16 inch. However‚ metal guides can sometimes be noisier during operation. Regular inspection is crucial to prevent corrosion and ensure continued smooth sliding action‚ extending the shower door’s lifespan.

Adjustable Bottom Guides

Adjustable bottom guides provide a versatile solution for shower doors that may have slight misalignments or variations in height. These guides allow for fine-tuning of the door’s position‚ ensuring a proper seal and smooth sliding motion.

They accommodate minor imperfections in the installation or settling of the shower enclosure. Adjustment mechanisms typically involve screws or clips. Proper adjustment is key to preventing sticking‚ wobbling‚ and water leakage‚ contributing to a longer-lasting and more functional shower experience.

Identifying Problems with Bottom Guides

Recognizing issues with your sliding shower door’s bottom guides is crucial for timely repair. Common signs include sticking‚ wobbling‚ or difficulty sliding‚ indicating wear or damage.

Common Signs of a Worn or Broken Guide

Detecting wear and tear on your sliding shower door bottom guides is the first step towards a smooth fix. A primary indicator is difficulty sliding – the door may feel stuck or require excessive force to move. Wobbling is another telltale sign‚ suggesting the guide isn’t properly stabilizing the glass panel.

Visually inspect the guide itself for cracks‚ breaks‚ or significant deformation. Loose guides that easily detach from the track also signal a problem. Ignoring these signs can lead to further damage and potential safety hazards‚ so prompt attention is key.

Sticking or Difficult Sliding

A sticking shower door often points directly to issues with the bottom guides. Accumulated soap scum and dirt within the track significantly impede smooth movement‚ increasing friction. Worn or damaged guides lose their ability to properly align the door‚ causing it to bind.

Before assuming a broken guide‚ thoroughly clean the track and lubricate with a silicone-based product. If the door remains difficult to slide after cleaning and lubrication‚ the guide likely requires replacement. Addressing this promptly prevents further strain on the entire system.

Wobbling Shower Door

A wobbling shower door is a clear indication of compromised bottom guide integrity. Worn or broken guides fail to provide the necessary stability‚ allowing the door to shift and sway during operation. This instability can create a dangerous situation‚ potentially leading to glass breakage.

Inspect the guides for visible damage‚ such as cracks or deformation. Ensure proper alignment within the track; misalignment exacerbates wobbling. Replacing damaged guides is crucial to restore stability and prevent further issues‚ ensuring safe and reliable shower door function.

Tools and Materials Needed for Repair

Repairing sliding shower door bottom guides requires a screwdriver‚ replacement guides (plastic or metal)‚ silicone lubricant‚ and cleaning supplies to effectively address the issue.

Screwdriver

A screwdriver is a fundamental tool for removing and installing sliding shower door bottom guides. Typically‚ a Phillips head screwdriver is required‚ as most guides are secured with screws of this type. However‚ depending on the specific guide and shower door model‚ a flathead screwdriver might also be necessary.

Ensure the screwdriver bit precisely matches the screw head to prevent stripping. Applying consistent pressure while turning is crucial for efficient removal and secure tightening of the new guide. Having multiple sizes available can be beneficial for various installations.

Replacement Bottom Guides

Obtaining the correct replacement bottom guides is critical for a successful repair. Guides like the Prime-Line M 6192 (Home Depot) and Shuisen M6219 (Amazon) are popular choices‚ often sold in 2-packs. These guides typically fit 1/2 inch channels and accommodate glass thicknesses up to 7/16 inch.

Ensure the new guides match the original’s material – plastic or metal – for optimal compatibility. Verify the guide’s dimensions and channel size before purchasing to avoid further issues during installation and ensure a proper fit.

Silicone-Based Lubricant

Silicone-based lubricant plays a vital role in restoring smooth sliding action after replacing bottom guides. Applying it to the shower door track minimizes friction‚ preventing sticking and ensuring effortless movement. This lubricant is preferred over oil-based products as it doesn’t attract dirt and grime‚ maintaining its effectiveness longer.

A thin‚ even coat is sufficient; excessive lubricant can create a slippery surface. Regular application‚ as part of preventative maintenance‚ keeps the door gliding smoothly and extends the life of the guides.

Cleaning Supplies (for track)

Effective cleaning supplies are crucial when replacing sliding shower door bottom guides. Accumulated soap scum and dirt within the track significantly hinder smooth operation and accelerate guide wear. Essential supplies include a non-abrasive cleaner‚ a scrub brush or sponge‚ and a microfiber cloth.

Thoroughly cleaning the track before installing the new guide ensures optimal performance. Removing debris prevents premature wear and tear‚ contributing to a longer-lasting‚ smoothly functioning shower door system.

Step-by-Step Guide to Replacing a Bottom Guide

Replacing a sliding shower door bottom guide involves assessing damage‚ removing the old guide‚ cleaning the track‚ installing the new one‚ and testing the sliding motion.

Step 1: Assessing the Damage

Begin by carefully inspecting the existing bottom guide for visible signs of wear‚ cracks‚ or breakage. Determine if the guide is loose or has become detached from the shower door. Observe how the door slides – is it sticking‚ wobbling‚ or difficult to move?

Check the track for accumulated soap scum and debris‚ as this can contribute to guide malfunction. Note the glass thickness (up to 7/16 inch) and channel size (typically 1/2 inch) to ensure compatibility with a replacement guide. Thorough assessment guides proper replacement.

Step 2: Removing the Old Guide

Using a screwdriver‚ carefully remove the screws securing the damaged bottom guide to the shower door. Support the door during removal to prevent it from falling or causing injury. Gently detach the old guide‚ noting its orientation for proper replacement.

If the guide is stuck‚ avoid excessive force; try wiggling it gently. Inspect the screw holes for damage and consider using new screws with the replacement guide. Handle the glass carefully throughout this process to avoid breakage or cuts.

Step 3: Cleaning the Shower Door Track

Thoroughly clean the shower door track to remove accumulated soap scum‚ dirt‚ and debris. Use appropriate cleaning supplies and a brush or cloth to scrub the track effectively. Ensure all residue is eliminated‚ as buildup can hinder the smooth operation of the new guide.

A clean track provides a smooth surface for the guide to glide upon‚ preventing sticking and ensuring proper alignment. Rinse the track with water and allow it to dry completely before proceeding with the installation.

Step 4: Installing the New Guide

Carefully install the new bottom guide into the designated slot within the shower door. Ensure it’s properly seated and aligned with the track. Secure the guide using the provided screws‚ tightening them firmly but avoiding over-tightening‚ which could damage the glass or the guide itself.

Double-check that the guide is flush and stable. Proper installation is crucial for the door’s smooth sliding action and overall stability. Verify the guide maintains secure attachment before testing.

Step 5: Testing the Sliding Motion

Gently test the shower door’s sliding motion after installing the new bottom guide. Slide the door back and forth several times‚ observing for any resistance‚ sticking points‚ or wobbling. A smooth‚ effortless glide indicates successful replacement.

If any issues persist‚ re-examine the guide’s installation‚ ensuring it’s correctly aligned and securely fastened. Apply a silicone-based lubricant to the track to further enhance smoothness and prevent future problems. Verify all rollers maintain correct positioning;

Choosing the Right Replacement Guide

Selecting the correct guide requires measuring glass thickness (up to 7/16 inch) and channel size (typically 1/2 inch). Consider plastic versus metal material for durability.

Measuring Glass Thickness (Up to 7/16 inch)

Accurate glass thickness measurement is crucial for selecting a compatible bottom guide. Most sliding shower door bottom guides‚ like the Shuisen M6219‚ are designed to accommodate glass thicknesses up to 7/16 inch.

Use a ruler or measuring tape to determine the precise thickness of your shower door glass. Incorrect sizing can lead to improper alignment‚ causing sticking or wobbling. Ensure the guide’s specifications clearly state its maximum glass thickness capacity before purchasing a replacement. A precise fit guarantees smooth operation and prevents potential damage.

Channel Size Compatibility (1/2 inch Channels)

Confirming channel size compatibility is vital when replacing sliding shower door bottom guides. Many guides‚ including the Prime-Line M6192 and Shuisen M6219‚ are specifically designed for 1/2 inch channels.

Measure the width of the track or channel where the bottom guide slides. An incorrect channel size will prevent proper installation and functionality. Ensure the replacement guide’s product description explicitly states its compatibility with 1/2 inch channels. A secure fit within the channel is essential for stable door movement and preventing future issues.

Material Considerations (Plastic vs. Metal)

Choosing between plastic and metal bottom guides depends on your needs and budget. Plastic guides‚ like the Prime-Line M6192‚ are cost-effective and won’t damage glass. However‚ they may wear out faster with heavy use.

Metal guides offer increased durability and are suitable for frequently used showers. Consider the potential for metal-on-glass contact and possible scratching. Evaluate the weight of your shower door; heavier doors benefit from the strength of metal guides for long-lasting support.

Preventative Maintenance for Bottom Guides

Regular cleaning with effective techniques and lubrication with silicone-based products are key. Inspect guides frequently for wear‚ ensuring smooth sliding and preventing future issues.

Regular Cleaning to Remove Soap Scum

Consistent cleaning is paramount for maintaining optimal bottom guide function. Soap scum and mineral deposits accumulate‚ causing friction and hindering smooth sliding. Utilize a non-abrasive cleaner specifically designed for shower doors and tracks.

A soft brush or cloth is ideal for scrubbing away residue from the guide and track. Thoroughly rinse with water after cleaning‚ ensuring no cleaner remains. This prevents corrosion and further buildup. Effective cleaning techniques‚ performed weekly‚ significantly extend the life of your guides and ensure effortless door operation.

Lubrication Schedule

Regular lubrication is crucial for preserving the smooth gliding action of your sliding shower door. Silicone-based lubricants are recommended‚ as they won’t damage the plastic or metal components. Avoid oil-based products‚ which can attract dirt and grime‚ exacerbating issues.

Apply a small amount of lubricant to the bottom guides and along the shower door track every three to six months‚ or more frequently with heavy use. This minimizes friction‚ prevents sticking‚ and extends the lifespan of the guides‚ ensuring effortless operation.

Inspecting for Wear and Tear

Regular inspection of your sliding shower door bottom guides is vital for preventative maintenance. Look for cracks‚ chips‚ or deformation in plastic guides‚ and signs of corrosion or bending in metal ones. Check if the guides are securely fastened and haven’t become loose over time.

Pay attention to any unusual noises during operation‚ like scraping or grinding‚ which could indicate wear. Early detection of damage allows for timely replacement‚ preventing more significant issues and ensuring continued smooth sliding action.

Troubleshooting Common Issues

Common problems include guides coming loose‚ doors still sticking post-replacement‚ or incorrect guide sizing. Verify secure attachment‚ proper lubrication‚ and correct part compatibility for solutions.

Guide Keeps Coming Loose

If the bottom guide repeatedly detaches‚ carefully inspect the screw holes within both the guide itself and the shower door frame. Stripped screw holes are a frequent culprit‚ preventing a secure hold. Consider using slightly larger screws‚ or employing toothpicks and wood glue to reinforce the existing holes before re-installation.

Ensure the guide is correctly aligned and fully seated within the track before tightening the screws. Regularly check the screws for tightness‚ as vibration from door usage can gradually loosen them over time. A dab of threadlocker on the screw threads can also help maintain a secure connection.

Door Still Sticks After Replacement

If sticking persists post-replacement‚ thoroughly clean the shower door track‚ removing all traces of soap scum and mineral deposits. These residues significantly impede smooth sliding. Apply a silicone-based lubricant generously along the track’s entire length‚ ensuring even distribution.

Verify the new guide is fully compatible with your door’s glass thickness and the track’s channel size. Inspect the top rollers for smooth operation; issues there can mimic bottom guide problems. Finally‚ confirm the door is properly aligned within the track‚ adjusting as needed.

Incorrect Guide Size

Using an improperly sized guide is a common cause of continued sliding issues. Ensure the new guide’s channel width precisely matches your shower door track – typically 1/2 inch. Confirm the guide accommodates your glass thickness‚ generally up to 7/16 inch.

A guide that’s too small will bind‚ while one that’s too large will allow excessive wobble. Double-check product specifications before purchase and compare them meticulously to your existing hardware. Incorrect sizing negates the benefits of replacement and requires another attempt.

Where to Buy Replacement Guides

Replacement guides are readily available at major retailers like Home Depot (Prime-Line M 6192) and online marketplaces such as Amazon (Shuisen‚ M6219) for convenient purchase.

Home Depot (Prime-Line M 6192)

Home Depot carries the Prime-Line M 6192 Sliding Shower Door Bottom Guide‚ a popular and readily available option for many standard shower enclosures. This guide features a durable plastic construction in a gray finish‚ designed to fit 1/2 inch channels commonly found in shower door tracks.

The M 6192 is sold in convenient 2-packs‚ providing replacements for both sides of your shower door. Installation requires only a screwdriver and two fasteners‚ making it a straightforward DIY project. It’s a cost-effective solution for restoring smooth sliding action to your shower door.

Amazon (Shuisen‚ M6219)

Amazon offers the Shuisen M6219 Sliding Shower Door Bottom Guide as a reliable replacement part for top-hung tub enclosure systems. This guide is specifically designed for glass thicknesses up to 7/16 inch and fits standard 1/2 inch channels‚ ensuring compatibility with many shower door setups.

Sold in 2-packs with included screws‚ the Shuisen M6219 provides a complete solution for addressing sticking or misaligned shower doors. Constructed from plastic‚ it’s a durable and affordable option for DIY repairs‚ restoring smooth and quiet sliding functionality.

Cost of Replacement Guides

Replacement bottom guides are generally affordable‚ typically sold in 2-packs ranging from $10 to $20‚ offering a cost-effective solution for shower door repairs.

Typical Price Range for 2-Packs

When purchasing replacement sliding shower door bottom guides‚ expect to find 2-packs generally priced between $10 and $20. Prime-Line guides‚ available at Home Depot‚ often fall within this range. Amazon offers options like Shuisen guides (M6219) also typically priced around $15-$20 for a two-pack.

The exact cost can vary based on the material – plastic guides are usually less expensive than metal ones – and the retailer. Considering the convenience and cost-effectiveness‚ replacing guides is a budget-friendly DIY repair.

Safety Precautions

Always protect your hands with gloves during removal and installation. Handle the glass shower door carefully to avoid breakage or injury during the repair process.

Protecting Hands During Removal and Installation

When working with sliding shower door bottom guides‚ prioritizing hand protection is crucial. The edges of the glass door and the metal or plastic guides can be surprisingly sharp‚ posing a risk of cuts. Always wear heavy-duty work gloves throughout the entire process – from removing the old‚ potentially brittle guide‚ to installing the new replacement.

These gloves will provide a barrier against abrasions and accidental cuts. Additionally‚ be mindful of any screws or fasteners; a secure grip is essential to prevent slippage and potential injury while using a screwdriver. Safety first ensures a smooth repair!

Handling Glass Carefully

Shower door glass is heavy and fragile‚ demanding extreme caution during bottom guide replacement. Always have a second person assist when maneuvering the glass‚ especially during removal or if adjustments are needed. Support the glass panel fully to prevent undue stress and potential breakage.

Avoid placing the glass directly on hard surfaces; use protective padding like blankets or towels. Inspect the glass for existing cracks or chips before starting – any damage compromises its integrity. Slow‚ deliberate movements are key to preventing accidents and ensuring a safe repair process.

Long-Term Benefits of Maintaining Bottom Guides

Regular maintenance of sliding shower door bottom guides extends the door’s lifespan‚ prevents leaks‚ and ensures consistently smooth operation‚ saving you future repair costs.

Extended Shower Door Lifespan

Consistent maintenance of your sliding shower door bottom guides significantly contributes to the overall longevity of the entire shower enclosure system. By preventing undue stress on the rollers and glass panels‚ properly functioning guides minimize wear and tear. Addressing issues like sticking or wobbling promptly avoids more substantial damage down the line.

Neglecting these guides can lead to misalignment‚ potentially causing glass breakage or frame distortion. Regular cleaning and lubrication‚ coupled with timely replacement of worn parts‚ ensures years of trouble-free operation‚ ultimately protecting your investment and delaying the need for a complete shower door replacement.

Improved Water Containment

Well-maintained sliding shower door bottom guides are crucial for effective water containment within the shower enclosure. Properly aligned guides ensure a tight seal between the door and the track‚ preventing leaks and minimizing water spillage onto the bathroom floor. This is especially important with frameless designs where seals are critical.

Worn or damaged guides can cause the door to shift‚ creating gaps where water can escape. Addressing these issues promptly not only protects your bathroom from water damage but also contributes to a more comfortable and hygienic showering experience‚ reducing mold and mildew growth.

boat hoist guides

Boat Hoist Guides: A Comprehensive Overview (12/16/2025)

Maintaining your boat lift involves routine inspections for rust, tightening bolts, lubricating cables, and addressing any structural damage promptly to ensure longevity and safety.

Selecting the correct type of boat lift depends on your boat’s size, weight, water depth, and local environmental regulations for optimal performance and protection.

Regular maintenance is crucial; cleaning and rinsing lift cables, checking weight capacity, and inspecting bunk boards are essential steps for preventing costly repairs.

Pilings and dock structures require attention; promptly repairing damage ensures the boat lift’s stability and prevents potential hazards during lifting operations.

Understanding the various types – hydraulic, mechanical, pneumatic, and cable – allows informed decisions based on specific needs and budgetary considerations for your boat.

Boat hoists, also known as boat lifts, are essential pieces of equipment for waterfront property owners seeking convenient and secure methods for removing their vessels from the water. These systems offer significant advantages over traditional dockage, primarily by mitigating the damaging effects of prolonged saltwater exposure, marine growth, and potential impacts from waves or tides.

The core function of a boat hoist is to physically lift a boat out of the water, suspending it securely above the surface. This prevents fouling, corrosion, and the need for frequent bottom cleaning. Modern boat hoists come in a variety of designs, each suited to different boat sizes, weights, and docking environments.

Choosing the right boat hoist involves careful consideration of several factors, including the boat’s dimensions and displacement, the water depth at the dock, and the prevailing environmental conditions. Proper installation and regular maintenance are paramount to ensuring safe and reliable operation. A well-maintained boat hoist extends the life of your boat and provides peace of mind.

Ultimately, a boat hoist represents a valuable investment for any serious boat owner.

Types of Boat Hoists

Boat hoists are categorized based on their lifting mechanisms, each offering unique benefits and suited to different needs. Hydraulic boat hoists utilize fluid pressure to lift vessels, providing smooth and controlled operation, often favored for larger boats. Mechanical boat hoists employ a system of gears, levers, and cables, offering a robust and reliable solution, though potentially requiring more physical effort.

Pneumatic boat hoists leverage compressed air for lifting, known for their speed and simplicity, but may be less common for larger vessels. Cable boat hoists, a prevalent choice, use a winch and cable system to raise and lower boats, offering versatility and cost-effectiveness.

The selection of the appropriate type hinges on factors like boat size, weight, budget, and the availability of utilities like electricity or compressed air. Understanding the operational characteristics and maintenance requirements of each type is crucial for making an informed decision. Each system requires specific attention to ensure longevity and safe operation.

Hydraulic Boat Hoists

Hydraulic boat hoists are renowned for their smooth, controlled lifting capabilities, making them a popular choice for a wide range of vessels. These systems utilize pressurized fluid, typically oil, to power cylinders that raise and lower the boat; This design minimizes stress on the hull and provides precise positioning.

A key advantage is their ability to handle heavier loads with relative ease, making them suitable for larger boats. However, hydraulic hoists require regular maintenance, including checking for leaks and ensuring proper fluid levels. The hydraulic system must be inspected for corrosion and component wear.

Potential issues include pump failures and seal degradation, necessitating prompt repair. Despite these considerations, the efficiency and gentle lifting action of hydraulic boat hoists make them a valuable investment for many boat owners, offering reliable performance and longevity.

Mechanical Boat Hoists

Mechanical boat hoists operate using a system of gears, levers, and cables to lift and lower vessels. These hoists are generally more affordable than hydraulic or pneumatic systems, making them an attractive option for smaller boats and budget-conscious owners. They rely on manual or powered winches to generate the lifting force.

Regular maintenance is crucial for mechanical hoists, focusing on cable inspection and lubrication to prevent wear and tear. Ensuring proper gear alignment and tightening bolts are also essential tasks. While simpler in design, they require consistent attention to maintain operational safety and efficiency.

Potential issues include cable fraying, winch malfunctions, and gear damage, which may necessitate repair or replacement. Despite these considerations, mechanical boat hoists offer a reliable and cost-effective solution for lifting and storing boats, particularly in situations where complex systems aren’t required.

Pneumatic Boat Hoists

Pneumatic boat hoists utilize compressed air to power the lifting mechanism, offering a smooth and controlled lifting process. These systems are known for their reliability and relatively low maintenance requirements compared to hydraulic options. They are particularly well-suited for environments where electrical hazards are a concern, as they don’t rely on electricity for operation.

However, pneumatic hoists necessitate a consistent supply of compressed air, often requiring an air compressor and storage tank. Regular checks of air lines, fittings, and the air motor are vital to prevent leaks and ensure optimal performance. Proper lubrication of moving parts is also essential for longevity.

Potential issues can include air compressor failures, leaks in the pneumatic lines, and valve malfunctions. While generally robust, pneumatic boat hoists demand periodic inspection and repair to maintain safe and efficient operation, making them a dependable choice for many boat owners.

Cable Boat Hoists

Cable boat hoists represent a common and often cost-effective solution for lifting vessels, employing steel cables and a winch system to raise and lower boats. These hoists are generally suitable for a wide range of boat sizes and weights, offering versatility in application. However, they require diligent maintenance to ensure safe and reliable operation.

Regular inspection of the cables is paramount, looking for signs of fraying, corrosion, or damage. Lubricating the cables is crucial to reduce friction and prevent premature wear. Winch mechanisms also need periodic checks, including gear lubrication and brake adjustments. Proper spooling of the cables onto the winch drum is essential to avoid binding.

Potential issues include cable breakage, winch motor failures, and brake malfunctions. Addressing these promptly through repair or replacement is vital for preventing accidents. Selecting the correct cable diameter and winch capacity for your boat is critical for safe lifting.

Boat Hoist Maintenance: Essential Checks

Regular boat hoist maintenance is paramount for ensuring safe, reliable operation and extending the lifespan of your equipment. Essential checks begin with a thorough inspection for rust and corrosion on all structural components, including cables, winches, and supporting pilings. Addressing corrosion promptly prevents further deterioration and potential failures.

Verifying the weight capacity limits of your hoist is crucial before each lifting season. Exceeding these limits can lead to structural damage or catastrophic failure. Cable inspection and lubrication are also vital; cables should be checked for fraying, kinks, and proper spooling, and lubricated to reduce friction and wear.

Finally, assess the condition of bunk boards, replacing any that are cracked, worn, or damaged. These boards provide crucial support for the boat during lifting and should be in optimal condition. Consistent adherence to these checks safeguards your investment and ensures worry-free operation.

Regular Inspection for Rust and Corrosion

Consistent inspection for rust and corrosion is the cornerstone of effective boat hoist maintenance. Saltwater environments are particularly aggressive, accelerating the corrosion process on metal components. Focus on areas where dissimilar metals meet, as these are prone to galvanic corrosion. Thoroughly examine cables, winches, mounting brackets, and the hoist frame itself.

Look for surface rust, pitting, and signs of weakening metal. Early detection allows for timely intervention, preventing minor issues from escalating into costly repairs. Remove rust with a wire brush and apply a rust-inhibiting primer and paint. Pay close attention to welds, as these are often the first areas to corrode.

Regularly rinsing the hoist with fresh water after each use helps remove salt deposits. Consider applying a protective coating specifically designed for marine environments. Proactive rust prevention extends the life of your boat hoist and ensures its continued safe operation.

Checking Weight Capacity Limits

Adhering to weight capacity limits is paramount for safe boat hoist operation. Exceeding these limits can lead to structural failure, causing damage to the hoist, the boat, and potentially resulting in serious injury. The weight capacity is typically indicated on a label affixed to the hoist frame; ensure this label is legible.

Accurately determine your boat’s total weight, including fuel, gear, and any onboard equipment. Do not rely on estimates; consult the boat’s manufacturer specifications or weigh it at a certified scale. Compare this total weight to the hoist’s rated capacity, ensuring a comfortable margin of safety.

Regularly reassess the boat’s weight if you add significant equipment or make modifications. Never attempt to lift a boat exceeding the hoist’s capacity. Prioritize safety by respecting these limits and conducting thorough weight checks before each lift.

Cable Inspection and Lubrication

Regular cable inspection and lubrication are vital for the longevity and safe operation of your boat hoist. Cables are subject to significant stress and environmental exposure, leading to wear, corrosion, and potential failure. Inspect cables frequently for fraying, kinking, crushing, or broken wires.

Pay close attention to areas where the cable passes over drums or sheaves, as these are common wear points. If any damage is detected, replace the cable immediately. Lubrication reduces friction, prevents corrosion, and extends cable life. Use a high-quality cable lubricant specifically designed for marine applications.

Apply lubricant evenly along the entire length of the cable, ensuring it penetrates the strands. Frequent oiling prevents wearing out of the cables, maintaining smooth operation and preventing costly repairs. A well-maintained cable is a cornerstone of a reliable boat hoist system.

Bunk Board Condition and Replacement

Bunk boards are crucial components that support your boat’s hull when lifted, and their condition directly impacts the safety and integrity of the lifting process. Regularly inspect bunk boards for signs of wear, rot, cracking, or detachment. Look for areas where the carpet is torn or missing, exposing the wood underneath.

Damaged bunk boards can cause uneven weight distribution, potentially damaging your boat’s hull. Replace worn or damaged bunk boards promptly to maintain optimal support and prevent costly repairs. When replacing, ensure the new boards are the correct size and material for your boat and hoist system.

Consider using marine-grade lumber and high-quality carpet to withstand the harsh marine environment. Proper bunk board maintenance is a simple yet essential aspect of boat hoist upkeep, safeguarding your vessel and ensuring smooth lifting operations.

Boat Hoist Repair: Common Issues

Boat hoist repairs frequently involve addressing issues with the supporting structure. Damaged pilings or dock components compromise stability, necessitating prompt repair or replacement to prevent hoist failure. Motor and gearbox problems are also common, often stemming from wear and tear or insufficient lubrication; these may require professional servicing or component replacement.

Cable issues, including fraying, corrosion, or breakage, demand immediate attention. Cable replacement is a critical repair, requiring adherence to manufacturer specifications and safety protocols. Hydraulic system leaks, if present, must be addressed swiftly to maintain lifting power and prevent environmental contamination.

Regular inspections can identify these issues early, minimizing repair costs and downtime. Ignoring these common problems can lead to more extensive damage and potentially hazardous situations. Prioritizing timely repairs ensures the continued safe and reliable operation of your boat hoist.

Repairing Damaged Pilings and Dock Structure

Repairing damaged pilings and dock structures is paramount for boat hoist safety and longevity. Initial assessment involves identifying the extent of the damage – cracks, rot, or structural weakening. Minor cracks can sometimes be filled with marine-grade epoxy, but significant damage usually necessitates piling replacement.

Replacement often requires specialized equipment and expertise, potentially involving driving new pilings alongside the damaged ones and securing the hoist to the new supports. Dock structure repairs may include replacing damaged boards, reinforcing connections, and ensuring proper drainage to prevent further deterioration.

Regular inspections are crucial for early detection of damage. Addressing issues promptly prevents escalation and costly repairs. Always consult with a qualified marine contractor for complex structural repairs, ensuring compliance with local regulations and safety standards. A stable foundation is essential for reliable hoist operation.

Addressing Motor and Gearbox Problems

Addressing motor and gearbox issues requires a systematic approach. Begin by checking electrical connections, ensuring they are clean and secure. If the motor doesn’t run, test for power and inspect the overload protector. A faulty overload protector should be replaced, not bypassed.

Gearbox problems often manifest as unusual noises or difficulty lifting. Check the oil level and condition; low or contaminated oil can cause significant wear. If the oil appears milky, water has likely entered the system, requiring a complete flush and reseal. Inspect gears for wear or damage.

For complex repairs, consult a qualified marine mechanic. Attempting repairs without proper knowledge can lead to further damage or safety hazards. Regular maintenance, including oil changes and inspections, can prevent many motor and gearbox problems.

Cable Replacement Procedures

Cable replacement is a critical safety procedure demanding meticulous attention. Begin by disconnecting the power supply to the hoist. Carefully release tension from the old cable, noting its routing through the system. Inspect the winch drum and sheaves for wear or damage, replacing them if necessary.

Select a cable with the correct diameter, length, and breaking strength, matching the manufacturer’s specifications. Thread the new cable through the system, ensuring it’s properly seated in the grooves of the drum and sheaves. Apply lubricant liberally to the cable as it’s installed.

Securely attach the cable to the winch drum and anchor points, following the manufacturer’s instructions. Gradually tension the cable, inspecting for proper spooling and alignment. After installation, thoroughly test the hoist’s operation before placing any load on the new cable.

Hydraulic System Leak Repair

Hydraulic leaks compromise hoist performance and pose environmental risks, requiring prompt attention. First, identify the leak’s source – hoses, fittings, cylinders, or the pump. Depressurize the system completely before attempting any repairs, following safety protocols diligently.

For hose leaks, replace the entire hose; patching is not recommended. Tighten loose fittings, but avoid over-tightening, which can cause further damage. Inspect O-rings and seals, replacing them if worn or cracked. Cylinder leaks often necessitate professional repair or replacement.

Clean the affected area thoroughly before reassembly. After repairs, bleed the system to remove air, and carefully check for any remaining leaks under pressure. Regularly inspect hydraulic components to prevent future failures and maintain optimal hoist functionality.

Boat Hoist Safety Guidelines

Prioritizing safety during boat hoist operation is paramount. Always conduct a thorough pre-lift checklist, verifying cable condition, weight capacity, and proper bunk board alignment. Ensure the area beneath the hoist is clear of personnel and obstructions before initiating the lift.

Familiarize yourself with emergency stop procedures and ensure all operators are trained in their execution. Never exceed the hoist’s weight capacity, as this can lead to structural failure and potential accidents. Maintain a safe distance from the hoist during operation.

Employ proper loading and unloading techniques, distributing the boat’s weight evenly on the hoist. Avoid sudden movements or jerks during lifting or lowering. Regular safety inspections and adherence to manufacturer guidelines are crucial for preventing incidents.

Pre-Lift Checklist

Before each lift, a meticulous pre-lift checklist is essential for safe operation. Begin by visually inspecting all cables for fraying, kinks, or corrosion, ensuring proper lubrication. Confirm the hoist’s weight capacity is sufficient for the boat, accounting for fuel, gear, and passengers.

Verify the bunk boards are in good condition, securely attached, and appropriately positioned to support the hull. Check all nuts and bolts for tightness, addressing any looseness immediately. Ensure the surrounding area is clear of obstructions and personnel.

Test the emergency stop functionality to confirm it’s responsive. Finally, review the hoist’s operating manual and be aware of any specific safety precautions. A completed checklist confirms readiness and minimizes potential risks during the lifting process.

Emergency Stop Procedures

Immediate action is crucial during an emergency. Familiarize yourself with the location and operation of the emergency stop button – typically a large, red, easily accessible switch. In the event of a malfunction, such as cable slippage, uneven lifting, or unusual noises, activate the emergency stop immediately.

Once engaged, the hoist should cease operation instantly. Do not attempt to restart the system until the cause of the emergency is identified and rectified by a qualified technician. Assess the situation carefully, ensuring the boat is stable and secure.

Notify all personnel in the vicinity and prevent anyone from approaching the hoist. Document the incident thoroughly, including the time, conditions, and actions taken. Regular drills practicing emergency stop procedures are vital for preparedness.

Proper Loading and Unloading Techniques

Safe operation hinges on correct loading and unloading. Ensure the boat is properly positioned and centered on the hoist bunk boards before initiating the lifting process. Distribute the boat’s weight evenly to prevent instability during elevation.

Slow, controlled movements are paramount; Avoid sudden jerks or rapid lifting speeds. Continuously monitor the boat’s alignment and stability throughout the entire process. Use guide ropes or personnel to assist in maneuvering the boat if necessary.

During unloading, lower the boat gradually and ensure sufficient water depth is available. Never exceed the hoist’s weight capacity. Regularly inspect bunk boards for wear and tear, replacing them as needed to maintain secure contact with the hull. Prioritize a smooth, deliberate approach for both loading and unloading.

Choosing the Right Boat Hoist

Selecting the ideal boat hoist demands careful consideration of several key factors. Primarily, accurately assess your boat’s size and weight; the hoist must comfortably accommodate these dimensions without exceeding its capacity.

Water depth and bottom conditions are equally crucial. Shallow water may necessitate a different hoist type than deeper locations. Evaluate the seabed composition – muddy, sandy, or rocky – as this impacts foundation requirements.

Environmental factors, such as salinity and potential for storms, influence material selection and hoist durability. Adherence to local regulations and permitting requirements is non-negotiable. Consider long-term costs, including installation, maintenance, and potential repairs.

Ultimately, the right hoist balances functionality, safety, and budget, providing years of reliable service while protecting your valuable vessel.

Considering Boat Size and Weight

Accurately determining your boat’s dimensions and weight is the foundational step in hoist selection. Hoists are rated for specific capacities, and exceeding these limits compromises safety and can cause structural failure.

Measure the boat’s length, beam (width), and draft (depth below the waterline). Don’t underestimate weight; include the vessel itself, fuel, water, gear, and any permanently installed equipment. A slight overestimate is preferable to underestimation.

Consider future upgrades or potential weight increases. Choosing a hoist with a buffer allows for flexibility. Different hoist types – hydraulic, mechanical, etc. – have varying capacity ranges. Ensure the chosen hoist comfortably exceeds your boat’s maximum weight.

Proper weight distribution is also vital for stable lifting and long-term hoist performance. Consult with a professional if unsure about accurate weight calculations.

Water Depth and Bottom Conditions

Evaluating water depth and the seabed composition is crucial for safe and effective hoist operation. Insufficient depth can hinder hoist functionality and potentially damage the boat or hoist components.

Measure the water depth at both high and low tide to ensure adequate clearance throughout the entire tidal range. Consider potential seasonal water level fluctuations. The bottom composition – mud, sand, rock, or coral – impacts foundation requirements.

Soft, muddy bottoms require wider, more substantial footings for pilings to prevent sinking or shifting. Rocky bottoms may necessitate specialized installation techniques. A geotechnical survey can provide detailed information about soil stability.

Assess potential for sedimentation or debris accumulation, which can reduce water depth over time. Proper planning and site preparation are essential for a stable and reliable hoist installation.

Environmental Factors and Regulations

Navigating environmental concerns and local regulations is paramount when installing a boat hoist. Coastal areas often have strict guidelines regarding construction near waterways, designed to protect marine ecosystems.

Obtain necessary permits from local authorities before commencing any work. Regulations may cover issues like shading of seagrass beds, disturbance of sensitive habitats, and water quality protection. Consider potential impacts from storm surges and wave action.

Choose environmentally friendly materials and construction practices whenever possible. Avoid using treated lumber that could leach harmful chemicals into the water. Implement erosion control measures to prevent sediment runoff.

Be aware of restrictions on hoist size, height, and placement. Compliance with all applicable regulations ensures responsible operation and avoids potential fines or legal issues.

manitowoc ice machine troubleshooting guide

Navigating issues with your Manitowoc ice machine? This guide offers solutions, from water supply concerns and ice production problems to electrical faults and maintenance.

Manitowoc ice machines are renowned for their durability and consistent performance in commercial settings, ranging from restaurants and bars to healthcare facilities and hotels. However, like any complex equipment, they can experience operational issues requiring troubleshooting. Understanding the fundamental components and common failure points is crucial for efficient maintenance and repair.

These machines rely on a sophisticated system involving water supply, refrigeration, and electrical controls to produce ice. Problems can stem from simple causes like clogged filters or low water pressure, to more complex issues such as refrigerant leaks or faulty control boards. This guide aims to provide a comprehensive overview of potential problems and practical solutions, empowering users to diagnose and resolve issues effectively. Regular preventative maintenance, including cleaning and filter replacements, is key to prolonging the lifespan and optimal function of your Manitowoc ice machine.

Understanding Common Ice Machine Problems

Ice machine malfunctions often fall into predictable categories. Water-related issues are frequent, encompassing low pressure, contaminated water sources, and failures within the inlet valve. Ice production problems manifest as insufficient output, oddly shaped cubes, or a complete cessation of ice making. Electrical faults can range from simple tripped breakers and blown fuses to more serious component failures preventing the machine from powering on.

Furthermore, scale buildup from mineral deposits and dirty condenser coils significantly impact performance. Clogged water filters restrict water flow, hindering ice production. Recognizing these common problem areas is the first step towards effective troubleshooting. A systematic approach, starting with simple checks and progressing to more complex diagnostics, will help pinpoint the root cause and restore your Manitowoc ice machine to optimal operation.

Water Supply Issues

Consistent water supply is crucial for Manitowoc ice machine operation. Low water pressure is a common culprit, preventing adequate water flow to the ice-making components. Check your building’s water pressure and ensure the machine isn’t connected to a shared line with high demand appliances. Dirty or filtered water problems arise from sediment or mineral buildup, impacting ice clarity and potentially damaging components; regular filter changes are vital.

A water inlet valve malfunction can also restrict water flow. This valve controls water entering the machine, and failure can stem from electrical issues or physical blockage. Inspect the valve for proper operation and replace if necessary. Always verify water lines are free from kinks or obstructions. Addressing these water supply concerns is fundamental to resolving many ice machine issues.

Low Water Pressure

Insufficient water pressure significantly hinders a Manitowoc ice machine’s ability to produce ice. Begin by verifying your building’s water pressure using a pressure gauge – ideally, it should be within the manufacturer’s recommended range (typically 20-60 PSI). If pressure is low building-wide, contact your water provider.

If the issue is isolated to the ice machine, check for kinks or obstructions in the water supply line. Ensure the machine isn’t sharing a water line with other high-demand appliances, as simultaneous use can reduce pressure. A partially clogged water filter can also restrict flow; replace it with a fresh one. Finally, inspect the water inlet valve for any signs of blockage or malfunction, as this valve regulates water entering the machine.

Dirty or Filtered Water Problems

Water quality is crucial for optimal ice machine performance. Dirty water introduces sediment and minerals, leading to scale buildup and affecting ice clarity. Regularly replace water filters according to the manufacturer’s schedule – typically every six months, or more frequently with heavily used machines. Consider a pre-filter if your water source is particularly unclean.

If using a water softener, ensure it’s functioning correctly, as improper softening can introduce unwanted chemicals. Excessive mineral content, even with filtration, can still cause scaling. Inspect the water supply line for corrosion or debris. A thorough cleaning of the water reservoir and distribution system may be necessary to remove accumulated contaminants and restore proper ice production.

Water Inlet Valve Malfunctions

A faulty water inlet valve prevents water from entering the ice machine, halting ice production. Symptoms include no water filling the reservoir or consistently low water levels. First, check the valve’s solenoid for proper voltage using a multimeter – a lack of power indicates an electrical issue upstream.

If voltage is present, the valve itself may be defective, clogged with sediment, or experiencing a mechanical failure. Inspect the valve screen for obstructions and clean it thoroughly. A continuity test can confirm if the valve’s coil is burned out. Replacement is often necessary for a malfunctioning valve. Ensure the new valve is compatible with your specific Manitowoc model. Proper installation is vital to prevent leaks and ensure reliable operation.

Ice Production Issues

Reduced or absent ice production is a common concern with Manitowoc machines. Several factors can contribute, ranging from simple issues like temperature settings to more complex mechanical failures. Begin by verifying the machine isn’t overloaded – excessive demand can temporarily limit output.

Check the air filters for blockage, as restricted airflow impacts cooling efficiency. Investigate potential problems with the water supply, ensuring adequate pressure and a clean water source. If ice cubes are small or misshapen, the water curtain may be uneven, or the freezing cycle is disrupted. A complete lack of ice production often points to issues with the compressor, harvest cycle, or a faulty water inlet valve. Thorough diagnosis is crucial for effective repair.

Insufficient Ice Production

Experiencing lower-than-expected ice output? Several factors can cause insufficient ice production in your Manitowoc machine. First, confirm the unit isn’t operating beyond its capacity. Check the ambient temperature; higher temperatures demand more from the system. Inspect the air intake and exhaust vents for obstructions, hindering proper cooling.

Verify the water supply is delivering adequate pressure and volume. A partially clogged water filter can significantly reduce water flow. Examine the ice thickness control settings – an incorrect setting will affect production. If these checks don’t resolve the issue, a failing compressor or a problem within the harvest cycle may be the root cause, requiring professional attention for diagnosis and repair.

Small or Misshapen Ice Cubes

Are your ice cubes coming out unusually small or with an irregular shape? This often indicates issues with the water flow or the freezing cycle. Begin by checking the water pressure – insufficient pressure can lead to incomplete cube formation. Inspect the water inlet valve for any restrictions or malfunctions, hindering proper water delivery to the ice mold.

Examine the ice mold itself for damage or mineral buildup, which can distort the cube shape. A faulty temperature sensor might also be the culprit, causing inconsistent freezing. Furthermore, verify the correct ice thickness setting is selected. If the problem persists, a potential issue with the evaporator plate or the harvest cycle control board may require professional diagnosis and repair to restore optimal ice cube quality.

Ice Machine Not Making Ice At All

Encountering a complete standstill in ice production? Several factors could be at play. First, confirm the machine is receiving power and hasn’t tripped a circuit breaker. Check the main power switch and any emergency shut-off mechanisms. Next, verify the water supply is fully connected and the valve is open, ensuring water reaches the machine.

A frozen water line or a malfunctioning water inlet valve can also halt production. Inspect the harvest cycle – if it’s not initiating, the ice may not be released. A faulty control board or temperature sensor could prevent the cycle from starting. Finally, consider a potential refrigerant leak, which would severely impact cooling capacity. If basic checks fail, professional service is crucial to diagnose and resolve the underlying issue.

Electrical Problems

Electrical issues can swiftly halt your Manitowoc ice machine’s operation. The most common symptom is the machine failing to power on. Begin by checking the power cord for damage and ensuring it’s securely plugged into a functioning outlet. Investigate the circuit breaker dedicated to the ice machine; a tripped breaker indicates an overload or short circuit. Reset it if necessary, but persistent tripping signals a deeper problem.

Blown fuses are another frequent culprit. Locate the fuse box (often near the control panel) and inspect the fuses for breaks in the filament. Replace any blown fuses with the correct amperage rating. If these simple steps don’t restore power, a faulty control board, wiring issue, or internal component failure may require professional diagnosis and repair. Always disconnect power before inspecting electrical components.

Machine Won’t Turn On

A Manitowoc ice machine refusing to power on is a common, yet frustrating, issue. First, verify the machine is receiving power by checking the power cord connection at both the machine and the wall outlet. Ensure the outlet is functioning correctly by testing it with another device. Next, inspect the dedicated circuit breaker for the ice machine – a tripped breaker is a frequent cause. Reset it, but repeated tripping suggests a more significant electrical problem.

Check for blown fuses within the machine’s control panel area. Replace any damaged fuses with ones of the exact same amperage. If the machine still doesn’t respond, the issue could stem from a faulty power switch, a malfunctioning control board, or internal wiring problems. Always disconnect power before attempting any internal inspection or repair. Professional assistance may be required for complex electrical faults.

Tripped Circuit Breakers

Repeatedly tripped circuit breakers signal an electrical overload or short circuit within your Manitowoc ice machine. Do not simply keep resetting the breaker; this can be dangerous and doesn’t address the underlying problem. First, disconnect all power to the machine. Inspect the power cord for any visible damage – cracks, fraying, or exposed wires. A damaged cord needs immediate replacement.

Overloads can occur due to a malfunctioning component, such as the compressor, fan motor, or defrost heater. These components draw significant power, and a failure can cause a surge. Internal electrical shorts, often caused by moisture or corrosion, are also common culprits. Professional diagnosis is crucial to pinpoint the exact cause. Attempting repairs without proper knowledge can lead to further damage or electrical shock. A qualified technician can safely identify and resolve the issue.

Burned Out Fuses

A burned-out fuse indicates an overcurrent situation within the Manitowoc ice machine’s electrical system. Like tripped circuit breakers, repeatedly blown fuses aren’t a solution – they’re a symptom. Always disconnect power before inspecting or replacing fuses. Locate the fuse box (typically near the control panel) and visually inspect the fuses. A broken filament or darkened glass signifies a blown fuse.

Replace the blown fuse with one of the exact same amperage and type – never substitute with a higher amperage fuse, as this could cause severe damage or fire hazard. If the new fuse blows immediately, it confirms a persistent electrical problem. Common causes include a failing compressor, a shorted motor, or a faulty control board. Professional assistance is strongly recommended to diagnose and repair the underlying issue. Ignoring this warning can lead to extensive and costly repairs.

Cleaning and Maintenance Related Issues

Regular cleaning and maintenance are crucial for optimal Manitowoc ice machine performance. Neglecting these tasks leads to several common problems. Scale buildup and mineral deposits, stemming from hard water, reduce efficiency and can damage internal components. Implement a descaling routine using a manufacturer-approved cleaner, following the machine’s instructions carefully.

Dirty condenser coils hinder heat dissipation, forcing the machine to work harder and potentially causing ice production issues. Clean the coils regularly with a soft brush or vacuum. Clogged water filters restrict water flow, impacting ice quality and potentially leading to machine shutdowns. Replace filters as recommended by Manitowoc – typically every six months, or more frequently with heavily used machines. Consistent maintenance prevents costly repairs and extends the machine’s lifespan.

Scale Buildup and Mineral Deposits

Scale formation within a Manitowoc ice machine is a frequent issue, particularly in areas with hard water. Mineral deposits, primarily calcium and magnesium, accumulate on critical components like the evaporator plate and water lines. This buildup restricts water flow, reducing ice production capacity and increasing energy consumption. Visible scale appears as white, chalky residue.

Regular descaling is essential. Utilize a Manitowoc-approved descaling solution, carefully following the manufacturer’s instructions for dilution and application. Improper descaling can damage the machine. The process typically involves circulating the descaling solution through the machine’s water system. Preventative measures include water filtration and consistent cleaning schedules. Ignoring scale buildup leads to reduced efficiency, potential component failure, and ultimately, costly repairs.

Dirty Condenser Coils

The condenser coils are vital for dissipating heat from the refrigeration cycle in your Manitowoc ice machine. Over time, these coils accumulate dust, dirt, and debris, hindering their ability to effectively release heat. This reduced efficiency forces the compressor to work harder, leading to increased energy consumption and potential overheating. A noticeable symptom is warmer air around the machine’s condenser unit.

Regular cleaning of the condenser coils is crucial for optimal performance. Disconnect the machine from power before cleaning. Use a vacuum cleaner with a brush attachment to gently remove dust and debris. Avoid bending the delicate fins. Consider professional cleaning at least annually for a thorough deep clean. Neglecting condenser coil maintenance can result in compressor failure, a significant and expensive repair. Maintaining clean coils extends the machine’s lifespan and ensures consistent ice production.

Clogged Water Filters

Water filters are essential for removing impurities that can affect ice quality and machine performance in your Manitowoc ice maker. Clogged filters restrict water flow, leading to reduced ice production or even a complete stoppage. This restriction also puts strain on the water inlet valve and pump, potentially causing premature failure. Poor water quality can contribute to scale buildup and mineral deposits within the machine.

Regular filter replacement is paramount. The frequency depends on water quality and machine usage, but generally, filters should be changed every six months, or more often if needed. Inspect filters monthly for discoloration or sediment buildup. A noticeable decrease in ice production or cloudy ice cubes are indicators of a clogged filter. Always use genuine Manitowoc replacement filters to ensure proper fit and filtration. Ignoring filter maintenance compromises ice quality and machine longevity.

Specific Manitowoc Model Troubleshooting

Manitowoc offers a diverse range of ice machines, each with unique characteristics and potential issues. Troubleshooting often requires model-specific knowledge for effective resolution. The QM Series, known for its modular design, frequently experiences problems with the water distribution tube or the harvest assist module. Indigo Series machines, with their advanced diagnostics, may display error codes indicating specific component failures, like the ice thickness probe.

S Series models, often found in high-volume applications, can suffer from issues related to the evaporator plate or the water curtain. Consulting the specific model’s service manual is crucial for accurate diagnosis and repair. Manitowoc provides detailed documentation online, including parts diagrams and troubleshooting flowcharts. Remember to always disconnect power before attempting any repairs and prioritize safety.

Manitowoc QM Series Troubleshooting

The Manitowoc QM series, celebrated for its modularity, presents common issues like inconsistent ice production or complete failures. A frequent culprit is the water distribution tube, becoming clogged with scale or debris, restricting water flow to the evaporator plate. Inspect and clean or replace this tube regularly. Harvest assist module malfunctions are also prevalent, preventing proper ice separation.

Check the harvest cycle components – the grid, fingers, and motor – for damage or obstruction. Error codes displayed on the control panel offer valuable diagnostic clues; consult the service manual for interpretation. Low refrigerant levels can also impact performance. Always verify proper water pressure and filter condition before diving into complex repairs. Prioritize safety by disconnecting power before any maintenance.

Manitowoc Indigo Series Troubleshooting

Manitowoc Indigo series ice machines, known for their advanced diagnostics, often display error codes pinpointing the issue. Common problems include issues with the ice thickness probe, leading to inconsistent cube size or production. Verify the probe’s functionality and replace if necessary. Water flow restrictions are also frequent, stemming from clogged water filters or low water pressure. Regularly inspect and replace filters.

The Indigo series utilizes a sophisticated control board; ensure it’s receiving power and isn’t damaged. Check the curtain system for proper operation, as malfunctions can halt ice harvest. Refrigerant leaks can significantly reduce ice output, requiring professional attention. Always consult the service manual for specific error code definitions and troubleshooting steps. Prioritize safety by disconnecting power before any maintenance.

Manitowoc S Series Troubleshooting

Manitowoc S Series ice machines are robust but can experience issues like reduced ice production, often linked to scale buildup within the evaporator. Regular descaling is crucial for maintaining efficiency. Inspect the water inlet valve for proper operation; a faulty valve restricts water flow, impacting ice formation. Check the distribution tubes for blockages, hindering water circulation.

Electrical problems, such as tripped circuit breakers or blown fuses, are common. Verify the power supply and replace faulty components. The S Series’ harvest cycle should be monitored for smooth operation; interruptions can cause ice jams. Refrigerant issues require a qualified technician. Always refer to the Manitowoc service manual for detailed diagnostics and repair procedures, prioritizing safety by disconnecting power before any intervention.

Advanced Troubleshooting & Safety

Advanced Manitowoc ice machine troubleshooting demands caution and expertise. Checking the harvest cycle involves verifying proper operation of the grid, curtain, and sensors – irregularities indicate mechanical or control board issues. Refrigerant leaks, detectable by sight or specialized equipment, require a certified technician for repair due to environmental regulations and system complexity.

Safety is paramount. Always disconnect power before accessing internal components. Wear appropriate personal protective equipment (PPE), including gloves and eye protection. Never attempt repairs involving refrigerant handling without proper certification. Consult the Manitowoc service manual for specific safety guidelines and component locations. Ignoring safety protocols can lead to injury or further damage to the machine. Prioritize professional assistance for complex repairs.

Checking the Harvest Cycle

The harvest cycle is crucial for ice production. Begin by observing the grid and curtain – they should move smoothly and completely clear ice from the evaporator plates. Listen for unusual noises during the cycle, which could indicate a mechanical issue with the motor or linkage. Verify sensor functionality; sensors detect ice thickness and initiate the harvest. A faulty sensor can lead to incomplete harvests or premature cycles.

Inspect the water distribution system during the harvest. Water should flow evenly across the evaporator. Check for ice buildup on the grid or curtain, suggesting a timing or water flow problem. Consult the machine’s service manual for specific cycle timings and sensor values. A properly functioning harvest cycle is essential for consistent ice production and efficient operation.

Refrigerant Leaks and Issues

Refrigerant problems severely impact ice production. Suspect a leak if ice production diminishes or the compressor runs constantly. Visually inspect all refrigerant lines and connections for oil residue, a telltale sign of a leak. Use a refrigerant leak detector for precise identification – never rely solely on sight or smell.

Low refrigerant levels can cause the compressor to overheat and fail. Do not attempt to recharge the system yourself; this requires EPA certification. Check the compressor’s operation – listen for unusual noises or excessive vibration. A restricted refrigerant flow, caused by a blockage, can also mimic a leak. Professional servicing is crucial for diagnosing and repairing refrigerant issues safely and effectively.

Safety Precautions When Troubleshooting

Prioritize safety when working on Manitowoc ice machines. Always disconnect power at the breaker before performing any maintenance or repairs; Water and electricity are a dangerous combination – ensure all components are dry before re-energizing. Wear appropriate personal protective equipment (PPE), including gloves and eye protection.

Refrigerant handling requires EPA certification; improper handling can be harmful to the environment and your health. Be cautious of sharp edges and moving parts within the machine. Never bypass safety devices, such as pressure switches or thermal overloads. If you are uncomfortable with any aspect of the troubleshooting process, consult a qualified technician. Ignoring these precautions can lead to injury or further damage.